When you're staring in the mirror, watching your hairline change, the not-knowing is often the worst part. A scalp biopsy for hair loss is a diagnostic procedure that cuts through the noise, replacing frustrating guesswork with solid, scientific answers. It’s a simple, minor procedure where a dermatologist takes a tiny sample of your scalp skin to see exactly what’s going on with your hair follicles.
Why a Biopsy Can Be Your Best Move
Trying to treat hair loss without a firm diagnosis is like trying to fix a car engine just by listening to it—you're just guessing. You can waste time and money on different treatments, but you're working off assumptions, not facts. A scalp biopsy gives your doctor the hard evidence needed to create a treatment plan that's actually right for you.
Think of it as a detective getting clues straight from the scene of the crime. A quick look at your scalp might suggest the cause, but a biopsy confirms it by revealing the story happening just beneath the surface. It becomes the go-to tool when the pattern of hair loss is unusual, or when multiple conditions seem to fit the bill.
Getting to the Root of the Problem
A biopsy does more than just put a name to your condition; it tells you the "why" and "how" behind your hair loss. It reveals critical details that a simple visual exam could never pick up.
- Nailing the Diagnosis: It can definitively tell you if you're dealing with standard male pattern baldness, an autoimmune issue like alopecia areata, or a more aggressive scarring alopecia that needs a specific, urgent response.
- Checking Follicle Health: The sample gives a clear picture of your hair follicles. Are they shrinking (miniaturizing), which is the hallmark of androgenetic alopecia? Or are they being damaged by inflammation?
- Directing Your Treatment: The results create a roadmap for what to do next. For example, if the biopsy shows that your follicles are still there but just dormant, you could be an excellent candidate for regenerative treatments like PRP therapy, which focuses on waking them up.
Before we dive deeper, here’s a quick overview of what a scalp biopsy entails.
Scalp Biopsy At a Glance
This table gives you a quick summary of the key aspects of a scalp biopsy, so you know exactly what the procedure involves.
| Aspect | Description |
|---|---|
| Procedure Type | Minor in-office surgical procedure. |
| Anesthesia | Local anesthetic is used to numb the area completely. |
| Sample Size | A very small skin sample, typically 2-4 mm in diameter. |
| Stitches | Usually requires 1-2 stitches, which are removed in 7-14 days. |
| Pain Level | Minimal discomfort; you'll only feel the initial numbing injection. |
| Recovery Time | Quick. You can typically resume normal activities the same day. |
| Purpose | To diagnose the exact cause of hair loss at a microscopic level. |
Understanding these basics really helps demystify the process, making it feel much less intimidating.
What the Pathologist Is Looking For
Once that tiny tissue sample gets to the lab, a specialist—a pathologist—examines it under a microscope for specific clues. Androgenetic alopecia (male pattern baldness) affects a massive 50% of men by age 50, and a biopsy can confirm it by analyzing follicle counts and growth stages.
The pathologist will be looking for an increased number of miniaturized (shrunken) follicles and a shift in the ratio of growing hairs (anagen) to resting hairs (telogen). This kind of granular detail is exactly what's needed for a rock-solid diagnosis.
A scalp biopsy is widely considered the gold standard for diagnosing complex hair loss. It offers an unmatched level of detail about your follicles, inflammation, and scalp health, paving the way for a truly personalized treatment plan.
In the end, this procedure isn't something to be anxious about. It’s the most powerful first step you can take to regain control. By getting a clear, evidence-based diagnosis, you stop the cycle of ineffective solutions and start on a path that actually works. Many different things can cause thinning, so it's critical to understand the specific scalp conditions that cause hair loss to see why a precise diagnosis is so important.
What to Expect During a Scalp Biopsy
Knowing what’s coming can take the edge off any medical procedure. The good news is that a scalp biopsy for hair loss is surprisingly simple and quick. It’s all done right in the doctor's office and usually takes less than 30 minutes from start to finish. Let's walk through it so you know exactly what to expect.
It all begins with a conversation. You'll sit down with a specialist to discuss your hair loss journey and they'll take a close look at your scalp. The main goal here is to find the perfect spot to take a sample. Ideally, this is right on the border of a thinning area, allowing them to capture both affected and healthy follicles for a side-by-side comparison. Finding the right professional is half the battle; understanding what doctor to see for your hair loss is a great first step.
The Procedure: A Step-by-Step Breakdown
Once the spot is picked, the actual biopsy is fast and designed to be as painless as possible. First, the doctor will thoroughly clean the small patch of skin.
Next up is the local anesthetic. You’ll feel a quick pinch from a tiny needle—much like you'd get before a dental filling—as it injects a numbing agent. In just a few moments, the area will be completely numb, so you won't feel a thing during the biopsy itself.
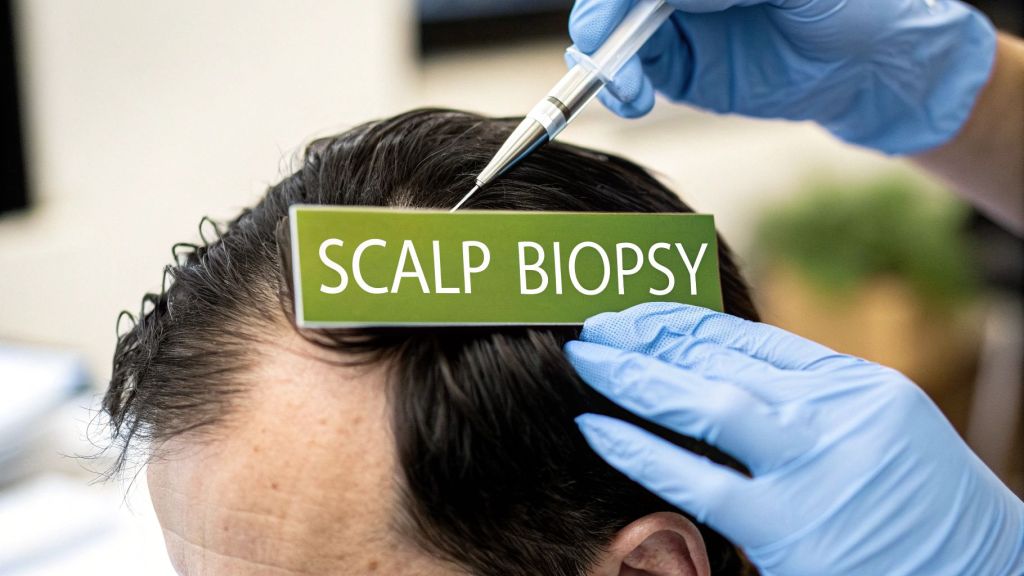
The most common technique is called a punch biopsy. Your doctor uses a small, circular tool that works a bit like a tiny cookie cutter. It's pressed against your scalp to remove a small cylinder of tissue, typically about 4mm in diameter.
After the sample is collected, the doctor will apply some gentle pressure to stop any minor bleeding. The tiny opening is then closed up with one or two small stitches, which you'll have removed about a week or two later. They'll put a small bandage over the site, and you're all set.
This whole process is a clear, logical path from concern to diagnosis.

As you can see, it's designed to take the guesswork out of your hair loss and give you a solid answer to build a treatment plan on.
What Happens to the Sample in the Lab
The real detective work begins after you leave the clinic. Your tissue sample is sent off to a specialized lab where a dermatopathologist—a skin pathologist—gets to work. They’ll examine it under a high-powered microscope, and the way they prepare the sample is crucial for getting the full story.
Many specialists favor a technique known as horizontal sectioning. Think of it like this: you could look at a forest by examining one tree from its roots to its top branches (a vertical section). Or, you could take a slice through the middle of the entire forest to see all the trees at once (a horizontal section). This horizontal view allows the pathologist to count and analyze hundreds of individual hair follicles from that one tiny sample.
The difference this makes is staggering. A single 4mm punch biopsy, when analyzed using horizontal sections, can provide a view of hundreds of follicles. This pushes the diagnostic accuracy for common conditions like androgenetic alopecia up to 98%, a massive improvement over the 79% accuracy you might get from a standard vertical biopsy.
It's this microscopic detail that makes the scalp biopsy such a powerful tool. It provides the hard evidence needed to stop guessing and start building a treatment plan based on facts.
How to Prepare for Your Biopsy and Handle Aftercare
A successful scalp biopsy hair loss procedure and a quick recovery really boil down to good preparation and proper aftercare. When you know what to do before and after, the whole process feels much less intimidating and more like a routine check-up.
Think of it this way: good prep helps your dermatologist get a clean, accurate sample, which is exactly what you want for a solid diagnosis. Most of the steps are just minor tweaks to your routine in the day or two before your appointment.
Your Pre-Procedure Checklist
Your doctor will give you the full rundown, but most pre-biopsy prep is pretty standard. The main goals are to keep bleeding to a minimum and make sure your scalp is clean and ready for the procedure.
- Talk About Your Meds: This is a big one. Be sure to tell your doctor about everything you take, including prescriptions, over-the-counter drugs, and even supplements. They might ask you to pause things like blood thinners, certain painkillers like ibuprofen, or high doses of vitamin E, all of which can increase bleeding.
- Hold the Alcohol: For at least 24 hours before your appointment, it's best to skip any alcoholic drinks. Alcohol can also thin your blood, which you want to avoid.
- Wash Your Hair (But Keep it Simple): On the morning of the procedure, wash your hair with your regular shampoo. But don't load it up with gels, sprays, or other heavy styling products. A clean, product-free scalp is the perfect canvas.
Taking these small steps really does make a difference. It helps the whole thing go off without a hitch.
Following these simple pre-procedure guidelines isn't just about making the doctor's job easier; it's about minimizing your own risk of bruising or bleeding and ensuring the tissue sample is perfect for an accurate diagnosis.
A Simple Guide to Aftercare and Healing
Once the biopsy is over, the focus shifts to letting that tiny wound heal up. The aftercare is incredibly straightforward and is all about preventing infection and keeping you comfortable. You’ll get specific instructions from your doctor, but here’s a general idea of what to expect.
For the first 24 hours, the main rule is to keep the area clean and dry. Your doctor will put a small bandage on the site—just leave it be. After that first day, you can usually start gently cleaning the spot with a bit of soap and water, followed by a thin layer of antibiotic ointment.
So, when can you get back to normal? Most guys can gently wash their hair again about 48 hours after the procedure. Just be careful not to scrub too hard around the stitches until they’re out, which is usually in about 7 to 14 days. Often, doctors will run blood work alongside a biopsy to check for other issues; learning how to read blood test results can give you a much clearer picture of what’s going on.
And what about a scar? Don't worry. The site is tiny, usually just a few millimeters. Once it’s healed and your hair grows back around it, you’ll likely never even see it. The key is simply to stick to your doctor’s aftercare plan. Do that, and you'll heal up quickly and cleanly.
Understanding Your Scalp Biopsy Results
Waiting for your biopsy results can be the most nerve-wracking part of the whole process. When the report finally arrives, it often reads like a foreign language, packed with technical terms. The real task is to translate that clinical jargon into something you can actually use—a clear plan for tackling your hair loss.
Think of the report as a detailed diagnostic map of your scalp. A specialist, known as a dermatopathologist, has analyzed your tissue sample under a microscope, hunting for specific clues. Their findings create a roadmap that points right to the cause of your hair loss and, crucially, what to do next.
Decoding the Pathologist's Report
Your report will zero in on a few key metrics. Getting a handle on what these mean is the first step toward taking control. The pathologist isn't just looking for a single problem; they're piecing together a puzzle from different observations to build a complete picture of your scalp's health.
Here’s what they’re typically looking at:
- Follicle Count and Size: First, they'll count the number of hair follicles in the sample. A low count can be a red flag, but the size of the follicles is often far more revealing. A high number of miniaturized (shrunken) follicles is the classic signature of androgenetic alopecia, or male pattern baldness.
- Terminal to Vellus Hair Ratio (T:V Ratio): A healthy scalp has a high ratio of thick, mature "terminal" hairs to the fine, almost invisible "vellus" hairs. In male pattern baldness, this ratio gets flipped on its head as terminal hairs shrink and become vellus-like. A T:V ratio below 4:1 is a strong signal that this is what's happening.
- Signs of Inflammation: The report will note any inflammatory cells hanging around your follicles. Inflammation can be a telltale sign of autoimmune issues like alopecia areata or certain types of scarring alopecias.
- Evidence of Scarring (Fibrosis): This is one of the most critical findings. If scar tissue has replaced hair follicles, it means you're dealing with a permanent form of hair loss. You can learn more about why this distinction matters in our guide on what is scarring alopecia.

From Diagnosis to a Clear Treatment Path
Getting these results isn't just about putting a name to your hair loss—it's about building a winning strategy. The biopsy provides the hard evidence you and your doctor need to pick a treatment with the highest probability of success for your specific situation.
For example, if the report confirms androgenetic alopecia with lots of miniaturized follicles, you're a prime candidate for treatments that tackle the hormonal pathways behind the shrinkage. But if rampant inflammation is the core problem, the game plan will shift to calming that immune response first.
Surprisingly, research shows that only 23.3% of patients with nonscarring alopecia even get a biopsy. This low rate can lead to misdiagnoses, which is why this definitive test is so important if you want to avoid being mislabeled and start the right treatment from day one.
How Results Can Greenlight Regenerative Therapies
Maybe the most empowering piece of information in that report is what it says about your potential for regrowth. A biopsy can definitively tell you if your hair follicles are gone for good or if they’re just dormant, waiting for a wake-up call.
If your biopsy report shows that follicles are still present—even if they are miniaturized or inactive—it's a very positive sign. This means you have a solid foundation for regenerative therapies like Platelet-Rich Plasma (PRP) to work with.
PRP therapy works by using growth factors from your own blood to nourish and reactivate these sleeping follicles, nudging them back into the growth phase to produce thicker, healthier hair. Without a biopsy, you’re just guessing if you’re a good candidate. With the report in hand, you have concrete proof.
Ultimately, understanding your scalp biopsy results shifts your role from a passive bystander to an active driver in your recovery. It gives you the clarity to have a productive, informed conversation with your doctor and confidently choose your path forward.
How Biopsies Stack Up Against Other Diagnostic Tools
A scalp biopsy is an incredibly powerful tool for getting to the bottom of hair loss, but it’s not always the first—or only—step. Think of it as calling in a specialist for a really tough case. Before that, your doctor has other, less invasive ways to gather clues about what’s going on.
Understanding how a biopsy compares to these other methods gives you the full picture of the diagnostic journey.
Trichoscopy: The Magnifying Glass for Your Scalp
Before even thinking about taking a tissue sample, most hair loss experts will start with trichoscopy. This is a completely non-invasive technique. Your doctor uses a special handheld microscope (a dermatoscope) to get a super-magnified view of your scalp and hair follicles.
It's like putting your scalp under a high-tech magnifying glass, revealing patterns and details completely invisible to the naked eye.
Trichoscopy is fantastic for a first look. It can quickly spot the telltale signs of common conditions:
- Miniaturized Hairs: Seeing a mix of thick and thin, wispy hairs is a classic sign of male pattern baldness.
- "Exclamation Point" Hairs: These uniquely shaped, broken hairs are a hallmark of alopecia areata.
- Scalp Inflammation: Redness, scaling, or other signs of irritation around the follicles can point toward an inflammatory condition.
Often, what the doctor sees with trichoscopy is enough to make a solid diagnosis and get you started on a treatment plan. But it’s still just a look at the surface. A scalp biopsy digs deeper, showing what’s happening underneath the skin with a level of detail that trichoscopy just can't provide.
If you're curious about other ways to assess your hair, you might also want to learn about a hair density test and what it measures.
The Role of Blood Tests
Another key piece of the puzzle is a simple blood test. While a biopsy looks directly at the scalp tissue, blood work checks for internal issues that could be causing or accelerating your hair loss from the inside out. It's the best way to rule out underlying health problems.
Your doctor will likely check for a few key things:
- Thyroid Hormones: An overactive or underactive thyroid is a very common cause of hair shedding.
- Key Nutrient Levels: Deficiencies in things like iron, vitamin D, and zinc are well-known culprits behind thinning hair.
- Hormonal Imbalances: Blood tests can measure androgens like DHT, the primary hormone responsible for male pattern baldness.
Blood tests give crucial context. If a deficiency or imbalance is found, fixing it can be a straightforward and effective part of your overall treatment. But, like trichoscopy, they don't show what's physically happening to the hair follicles on your scalp. That's where the biopsy truly shines.
While non-invasive tools like trichoscopy and blood tests are invaluable for the initial workup, a scalp biopsy is the gold standard when the diagnosis isn't clear. It provides the concrete, cellular-level evidence needed to tell complex conditions apart.
To put these tools in perspective, let’s compare them side-by-side.
Diagnostic Tool Comparison Biopsy vs Trichoscopy vs Blood Tests
| Diagnostic Tool | What It Is | Best For | Invasiveness |
|---|---|---|---|
| Scalp Biopsy | A small tissue sample from the scalp is removed and examined under a microscope. | Getting a definitive diagnosis for complex, scarring, or unusual hair loss conditions. | Minimally invasive; requires local anesthetic and a small punch tool. |
| Trichoscopy | Using a high-powered, polarized light microscope to view the scalp and hair shafts. | Initial screening for common conditions like androgenetic alopecia and alopecia areata. | Completely non-invasive. |
| Blood Tests | Drawing blood to analyze hormone levels, vitamin/mineral deficiencies, and thyroid function. | Identifying underlying systemic issues or internal triggers for hair loss. | Minimally invasive; requires a needle stick. |
Ultimately, these tools aren't competing with each other—they're complementary. A good doctor uses trichoscopy and blood tests to narrow down the possibilities first. Then, if things are still unclear, a scalp biopsy for hair loss is brought in to confirm the diagnosis and build the most effective treatment plan for you.
Taking Action After Your Biopsy Diagnosis
Getting a definitive diagnosis from your scalp biopsy for hair loss isn't the finish line—it's the starting block. This is where you can stop worrying and start doing something about it, using your results as a precise roadmap for treatment. Now you have the hard evidence you need to move forward with confidence.
Your biopsy report is the key that unlocks a personalized strategy. It tells you and your doctor exactly what you're up against. For example, a diagnosis of androgenetic alopecia with viable follicles is a green light for specific, targeted therapies.
This clarity allows you to have a genuinely productive conversation with a specialist and build a plan that makes sense for your specific condition. You're no longer guessing; you're making informed decisions.
Turning Your Diagnosis into a Game Plan
The most valuable piece of information from a biopsy is the status of your hair follicles. If the report shows your follicles are still there—even if they've shrunk or gone dormant—that’s incredibly good news. It means you have a solid foundation for regenerative treatments designed to wake them up.
This is where therapies like Platelet-Rich Plasma (PRP) really shine. PRP uses powerful growth factors from your own blood to nourish and reactivate those sleeping follicles, encouraging them to produce thicker, healthier hair. Without a biopsy, you’d just be hoping you're a good candidate; with one, you know for sure.
Once your scalp biopsy provides a clear diagnosis, you can explore various treatment paths tailored to your specific condition, such as advanced regenerative treatments like PRP with Microneedling.
The Power of PRP Backed by Evidence
PRP isn't just a hopeful theory; its effectiveness is supported by solid research. For instance, a review of 11 randomized controlled trials on PRP for hair loss confirmed it significantly increases follicle density and hair thickness. The result was high patient satisfaction without any serious side effects.
Your biopsy results transform your approach. You're no longer just fighting hair loss; you're investing in hair restoration with a strategy tailored to your unique biology.
Ultimately, your biopsy is more than just a medical report. It's your official green light to take decisive action, armed with the knowledge to choose the most effective path toward getting your hair—and your confidence—back.
Got Questions? We've Got Answers
Even after walking through the whole process, you probably still have a few things on your mind. That's completely normal. Let's tackle some of the most common questions guys ask when they're thinking about getting a scalp biopsy for hair loss.
Will the Biopsy Leave a Noticeable Bald Spot?
This is the big one, right? And the answer is almost always no. The tissue sample they take is tiny, usually just 4mm across. Think about the size of a pencil eraser.
Once the single stitch comes out and everything heals up, the spot is easily hidden by the hair around it. Plus, your doctor is smart about where they take the sample, picking a place that's not front and center. Honestly, in most cases, you’ll be the only one who ever knows it was done.
Is the Procedure Itself Painful?
Let's be straight with you: you'll feel a quick, sharp pinch from the needle when the local anesthetic goes in. It’s a lot like the feeling of getting novocaine at the dentist's office.
But after that initial sting, the area will be totally numb. You won't feel the biopsy itself happen. Most guys just report a bit of pressure, but zero pain. Any soreness that crops up later is usually nothing that a couple of Tylenol can't handle.
How Long Does It Take to Get Results Back?
This part requires a little patience, but the wait isn't too long. After the procedure, your sample gets sent off to a special lab. A dermatopathologist—a doctor who specializes in skin pathology—will then prep it and examine it under a microscope.
This detailed analysis usually takes about one to two weeks. As soon as the report is in, your doctor's office will give you a call to set up a follow-up appointment to go over the results and figure out the next best steps for you.
Will My Insurance Cover a Scalp Biopsy?
Most of the time, yes. When a scalp biopsy is done to figure out a medical condition behind your hair loss (like scarring alopecia, alopecia areata, or an infection), it’s considered a necessary diagnostic test. That means insurance companies will typically cover a good chunk of the cost.
That said, every plan is different. It’s always a good idea to call your insurance provider beforehand just to confirm what your plan covers. A quick phone call can save you from surprise bills and give you the peace of mind to move forward.
At PRP For HairLoss, we're convinced that a solid, accurate diagnosis is the first real step toward winning the fight against hair loss. Our resources are designed to help you understand all your options and take back control. See how we can help at https://prpforhairloss.com.

Leave a comment