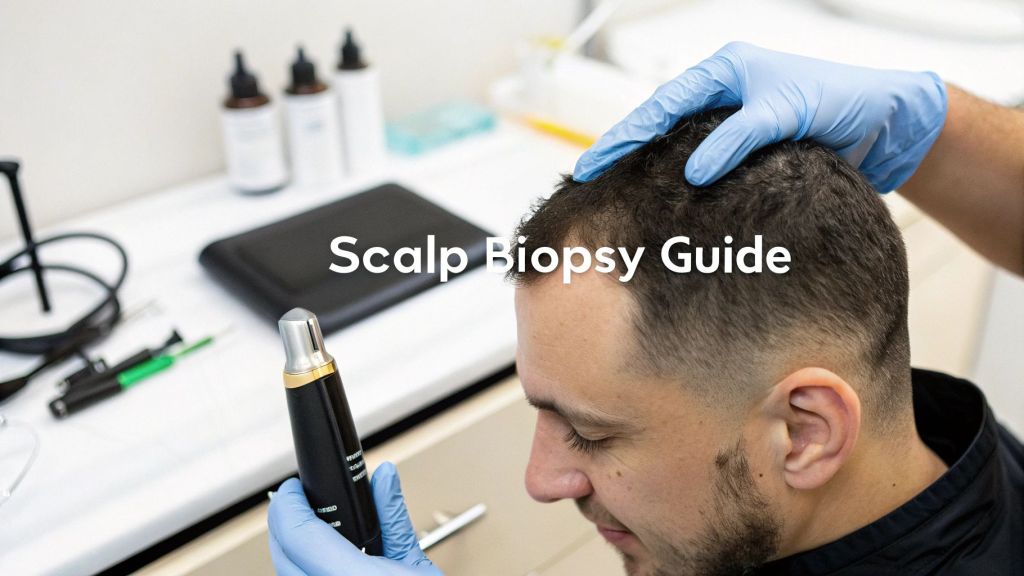
When you've tried all the over-the-counter treatments and you're still losing hair, a scalp biopsy for alopecia can give you the definitive answers a simple visual check can't. It's a minor procedure where a tiny skin sample is taken from your scalp and examined under a microscope. This gives your doctor a crystal-clear diagnosis to build an effective treatment plan.
Why Your Doctor Might Recommend a Scalp Biopsy

Let's be honest, figuring out why your hair is falling out can be incredibly frustrating. You've likely tried different shampoos, spent hours staring at your hairline in the mirror, and started wondering about the early signs. While our guide on how to tell if my hair is thinning is a great starting point, what you see on the surface isn't always the whole story.
Think of your dermatologist's initial exam like a bird's-eye view. They can often spot common culprits like male pattern baldness right away. But what if your hair loss doesn't fit the typical pattern? Or what if the usual treatments just aren't cutting it? This is exactly where a scalp biopsy comes in. It’s not some last-ditch effort; it's a smart, strategic move to get clarity.
Moving Beyond Guesswork
When looking in the mirror just leads to more questions, you need a better way to figure out how to stop hair loss. A biopsy delivers the hard evidence needed to tell one type of alopecia from another, especially since many can look deceivingly similar.
A scalp biopsy is like bringing in a detective to examine the crime scene—your hair follicles. It uncovers microscopic clues that reveal exactly what’s going wrong, whether it's inflammation, scarring, or something else entirely.
For instance, your doctor might suggest a biopsy if they suspect one of these conditions:
- Scarring Alopecia: This is a tough one. The hair follicles are actually destroyed and replaced by scar tissue, leading to permanent hair loss. Catching it early with a biopsy is absolutely critical to stop it in its tracks.
- Alopecia Areata: An autoimmune issue where the body's own immune system attacks the hair follicles, causing patchy hair loss. A biopsy can confirm the specific inflammatory cells responsible.
- Unexplained Inflammation or Sores: If your hair loss is accompanied by redness, scaling, or sores on your scalp, a biopsy is the best way to identify an underlying infection or skin condition.
Getting this level of detail is a game-changer. For men in the US, where 6-7 million are dealing with alopecia areata on top of common pattern baldness, this targeted approach can save years of trial and error. A scalp biopsy isn't just a procedure; it's your diagnostic safety net.
What a Scalp Biopsy Actually Reveals

So, what exactly is a scalp biopsy? Let's use an analogy. Imagine a mechanic listening to a strange engine noise. They can make an educated guess, but to know for sure, they need to look under the hood. A scalp biopsy is the medical equivalent of looking under the hood of your scalp.
A dermatologist takes a very small sample of your scalp tissue—we're talking just a few millimeters—to get a direct, microscopic look at what’s really going on with your hair follicles.
This isn’t just a surface-level glance. A scalp biopsy for alopecia provides the hard evidence needed to understand the health of your follicles, the presence of inflammation, and whether your hair has the potential to grow back. It replaces guesswork with a concrete diagnosis.
When Is a Biopsy Necessary?
Most guys with classic male pattern baldness won't need a biopsy; a visual exam is usually enough. But when the hair loss pattern is unusual or treatments aren't working, that's when a biopsy becomes a crucial diagnostic tool.
Your doctor might recommend one in a few key situations:
- Atypical Hair Loss: If your hair is falling out in patches or in a pattern that doesn't scream "male pattern baldness," a biopsy can uncover the real reason.
- Suspected Scarring Alopecia: Conditions like cicatricial alopecia are a big deal. They permanently destroy hair follicles and replace them with scar tissue. Getting an accurate diagnosis early is the only way to halt the progression and save the hair you have.
- Treatments Aren't Working: If you’ve been diligently using minoxidil or finasteride without seeing any results, something else might be going on. A biopsy can figure out what’s standing in the way of regrowth.
- Inflammation or Irritation: Is your hair loss accompanied by redness, scaling, sores, or a persistent itch? These are red flags that point to an underlying inflammatory or infectious issue that needs a closer look.
A biopsy is how we get your scalp to tell its story. It gives your doctor the precise information needed to determine if the problem is autoimmune, inflammatory, or something else entirely, which is essential for creating a treatment plan that has a real chance of success.
Uncovering the Microscopic Clues
After the tiny sample is taken, it's sent off to a lab where a dermatopathologist—a doctor who specializes in diagnosing skin diseases under a microscope—gets to work. They’re essentially a detective, searching for specific clues that point to a diagnosis.
This deep dive can reveal an incredible amount of information about the various scalp conditions that cause hair loss that a simple visual exam would miss completely.
For example, if the culprit is alopecia areata, the pathologist will spot a unique swarm of inflammatory cells huddled around the base of the hair follicles. If it's a scarring alopecia, they’ll see the tell-tale sign of fibrous scar tissue where healthy follicles used to be.
It’s this level of microscopic detail that makes a scalp biopsy the definitive diagnostic test for complex hair loss cases. It ensures you're treating the right problem with the right approach from day one.
Your Step-By-Step Guide to the Biopsy Procedure
Walking into any medical procedure, even a minor one, can be a bit nerve-wracking if you don’t know what to expect. The good news? A scalp biopsy for alopecia is a quick and straightforward process done right in your dermatologist's office.
Let's walk through exactly what happens. Knowing the steps can take the mystery out of it and help you feel much more comfortable on the day. The whole thing usually takes less than 15 minutes from start to finish. Your only job is to sit back while your doctor gathers the information they need to get to the bottom of your hair loss.
Selecting the Perfect Spot
First things first, your dermatologist needs to choose the best location for the biopsy. This isn't a random guess; it's a strategic decision.
The ideal spot is typically on the edge of an active area of hair loss. Why there? Because it allows the sample to capture both affected tissue and healthier follicles right next to it. This comparison gives the pathologist a complete picture of what’s happening. Your doctor might use a handheld magnifying tool called a dermatoscope to pinpoint the most representative area.
Finding the right specialist is the first crucial step; if you're wondering what doctor you see for hair loss, a board-certified dermatologist is the expert you need.
Numbing the Area
Once the site is chosen, the next step is to make sure you don’t feel a thing. Your doctor will clean the spot with an antiseptic and then inject a local anesthetic, usually lidocaine, just under the skin.
You'll feel a quick pinch from the needle, much like any other shot. This might be followed by a brief stinging sensation for a few seconds as the numbing agent starts to work. Within a minute or two, the area will be completely numb, making the rest of the procedure pain-free.
People often worry most about this part, but the discomfort is minimal and over in a flash. That numbness is what makes the actual biopsy a comfortable experience.
Now, let's walk through the actual procedure itself. To give you a clear, bird's-eye view, here's a simple timeline of what to expect on the day.
The Scalp Biopsy Procedure At a Glance
| Stage | What Happens | Typical Duration |
|---|---|---|
| Preparation | Your dermatologist identifies and marks the best biopsy site. | 1-2 Minutes |
| Anesthesia | The area is cleaned and numbed with a local anesthetic injection. | 1-2 Minutes |
| Sample Collection | A small punch tool is used to remove a tiny core of scalp tissue. | 1-2 Minutes |
| Closure | The doctor applies pressure and closes the site with 1-2 stitches. | 2-5 Minutes |
As you can see, each step is very quick. The longest part is often just waiting for the anesthetic to fully kick in.
Taking the Sample with a Punch Tool
With the area fully numb, your doctor will perform the biopsy. For hair loss diagnosis, the go-to method is the punch biopsy.
This technique uses a small, pen-like instrument with a circular blade at the tip. It’s typically just 4 mm in diameter—about the size of a standard pencil eraser. The dermatologist gently presses the tool against your scalp and rotates it, cutting a tiny, cylindrical core of tissue. This sample contains everything needed for analysis: the surface skin, the deeper layers, and most importantly, the full length of the hair follicles.
The sample is carefully lifted out and placed in a special preservative solution, ready to be sent off to the lab. Your doctor will then apply pressure to stop any minor bleeding before closing the tiny wound with one or two small stitches.
Vertical vs. Horizontal Sectioning: The Lab’s Perspective
Once the sample arrives at the lab, the dermatopathologist—a specialist in skin pathology—has to decide how to slice it for examination under the microscope. This isn’t a trivial choice; it completely changes what they can see.
-
Vertical Sectioning: Think of this as cutting a slice from a layer cake. The tissue is sliced from top to bottom. This method is fantastic for seeing the different layers of the skin and how they interact, which is crucial for diagnosing inflammatory conditions that affect the scalp.
-
Horizontal Sectioning: Now, imagine slicing a bagel. The tissue is cut parallel to the surface of the scalp. This view is incredibly valuable for counting the number of hair follicles in a specific area and assessing their size and growth stage. It’s the best way to quantify follicle density and miniaturization, which are the classic signs of androgenetic alopecia (male pattern baldness).
Your dermatologist will often specify which method they prefer based on what they suspect is causing your hair loss. In some complex cases, they might even take two tiny samples side-by-side to allow for both types of analysis, ensuring no stone is left unturned.
Setting Yourself Up for a Smooth Recovery
A successful scalp biopsy isn't just about what happens in the dermatologist's office—it's also about what you do before and after. A little preparation and proper aftercare can make a huge difference, ensuring your recovery is quick, comfortable, and free of any issues.
Think of it like this: if you were fixing a small patch on a wall, you'd prep the area first and then protect it while it dries. The same idea applies here. The steps are simple, but they're key to getting the best outcome.
Before Your Appointment
Your dermatologist will give you a list of specific instructions, but here are a few universal tips to help the day go smoothly. Feeling prepared is the best way to feel in control of the process.
First things first, have a chat with your doctor about any medications you're taking. They’ll likely ask you to temporarily stop taking blood thinners or even common supplements like fish oil and high-dose vitamin E for a few days before the procedure. This is a simple but crucial step to minimize any bleeding.
On the day of the biopsy, wash your hair with a gentle shampoo. The important part is to skip any styling products afterward—no gels, sprays, or even topical treatments like minoxidil. A clean, product-free scalp makes the whole process easier for the doctor and helps lower the risk of infection.
So what actually happens during the procedure? It’s a straightforward, three-step process.
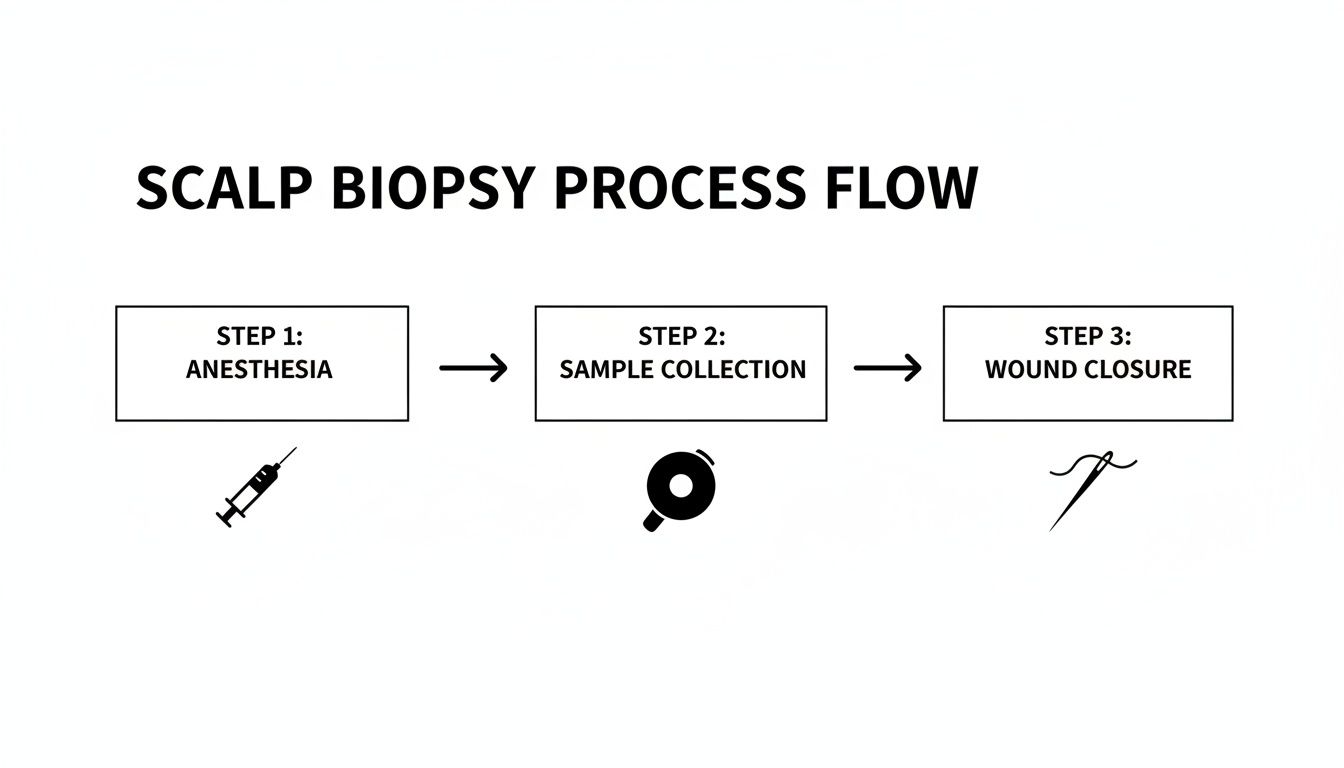
As you can see, it's really quick: the area is numbed, a tiny sample is collected, and then the site is closed up.
Aftercare: Your Guide to Healing Well
Proper aftercare is your ticket to a fast, complication-free recovery. Your main job is pretty simple: keep the small wound clean, dry, and protected while it heals.
Your doctor will give you a detailed handout, but it will almost certainly include these core instructions:
- Keep it Dry: For the first 24 hours, you'll need to keep the biopsy site completely dry.
- Gentle Cleaning: After that initial 24-hour period, you can gently wash the area with a bit of mild soap and water.
- Antibiotic Ointment: Applying a thin layer of an over-the-counter antibiotic ointment (like Polysporin) is a great way to prevent infection and keep the wound moist, which actually helps it heal better.
- Cover It Up: A simple bandage or Band-Aid is all you need to protect the spot from getting irritated or dirty.
Any minor soreness is usually easy to manage with Tylenol. Most guys are back to their normal routine, including work, the very next day. The only real restriction is to hold off on heavy workouts or swimming for about a week to give the stitch (or stitches) a chance to do its job without being pulled.
Expert Tip: The single most important part of aftercare is to follow your doctor's instructions to the letter. If you do that, the risk of infection or noticeable scarring is incredibly low.
It also helps to remember why this diagnostic step is so valuable. Conditions like alopecia areata affect about 2% of people worldwide, and getting the diagnosis right from the start is essential for effective treatment. In fact, you can learn more about the global impact of alopecia to understand the scale of the issue. A biopsy provides the diagnostic clarity needed to make sure you’re on the right treatment path from day one.
Decoding Your Scalp Biopsy Results

Getting a pathology report back after a scalp biopsy for alopecia can feel a bit like trying to read a foreign language. It's often dense with technical terms and microscopic observations that don’t mean much to anyone outside of a lab.
But buried in that medical jargon is the very answer you’ve been looking for. This report contains the hard evidence your dermatologist needs to finally put a name to your hair loss and build a treatment plan that’s actually right for you.
Think of the pathologist as a detective examining the scene. They aren't just glancing at hairs; they're analyzing the entire ecosystem of your scalp on a cellular level to figure out exactly what’s gone wrong.
What the Pathologist Is Searching For
The dermatopathologist—a doctor who specializes in skin pathology—is on a very specific mission when they look at your tissue sample. They’re hunting for the tell-tale signs that point directly to the root cause of your hair loss.
Their investigation centers on the hair follicles and the environment immediately around them. They'll meticulously count them, measure their size, and assess their overall health. They’re also looking for any signs of inflammation, scarring, or other microscopic troublemakers.
The pathology report is your scalp’s story told in microscopic detail. It translates the silent signals of your follicles into a clear diagnosis, moving you from the realm of guesswork into actionable, evidence-based treatment.
The whole point is to match the patterns they see under the microscope with the known signatures of different hair loss conditions. This provides a definitive answer that a simple visual exam just can't offer.
Translating Key Findings Into a Diagnosis
The language in the report might look intimidating, but each term is really just a clue. Understanding a few of the key phrases can help you see exactly how your doctor connects the dots to arrive at a diagnosis.
Here are some of the most common findings and what they actually mean:
- Follicular Miniaturization: This is the absolute classic sign of androgenetic alopecia (male pattern baldness). It means the pathologist is seeing that your hair follicles have physically shrunk, which is why they’re now producing thinner, weaker hairs.
- Peribulbar Lymphocytic Infiltrate: It sounds complicated, but it’s a very direct clue. This phrase means there’s a swarm of inflammatory white blood cells (lymphocytes) attacking the base (the bulb) of your hair follicles. This is the smoking gun for alopecia areata, which is an autoimmune condition.
- Fibrosis and Scar Tissue: If the report mentions fibrosis or a complete absence of follicles in certain areas, it’s a strong indicator of a scarring alopecia. This means the follicles have been permanently destroyed and replaced by scar tissue, which is critical for understanding how to know if hair loss is permanent.
- Shift in Hair Cycle Phases: The pathologist can literally see how many of your follicles are in the active growing (anagen) phase versus the resting (telogen) phase. A high ratio of resting hairs is a hallmark of telogen effluvium, a type of widespread shedding often triggered by stress, illness, or a major life event.
These microscopic details are precisely why a biopsy can be so crucial. One eye-opening study found that there can be up to a 70% difference between a doctor’s initial diagnosis based on sight alone and what the biopsy ultimately proves to be true.
How Your Results Shape Your Treatment Plan
At the end of the day, your biopsy results are the foundation for your entire treatment strategy. A concrete diagnosis is what allows your doctor to stop guessing and start targeting the problem with the right tools.
For instance, a confirmation of androgenetic alopecia means you're likely a great candidate for treatments like PRP therapy, finasteride, or minoxidil. But if that same biopsy had revealed a scarring alopecia, the game plan would shift entirely. The immediate priority would become aggressive anti-inflammatory treatments to stop the condition in its tracks before it destroys more follicles.
Without the biopsy, you could waste precious time and money on treatments that don't match your condition. With it, you and your doctor can move forward with confidence, giving you the best possible shot at stopping your hair loss and protecting the hair you still have.
When you're trying to get to the bottom of hair loss, your doctor has a few different tools in their arsenal. A scalp biopsy for alopecia is one of them, and it’s usually considered the final word—the most definitive test available.
Think of it like a detective's toolkit. Each tool has a specific job, and the biopsy is the forensic evidence brought in when the case is particularly tough to crack. To really appreciate why a biopsy is so powerful, it helps to see how it fits in with the other, less invasive methods your doctor will likely try first. These initial checks are great for catching common culprits, but they can't always give you the complete story.
Trichoscopy: The View From The Surface
Before even mentioning a biopsy, your dermatologist will almost certainly pull out a trichoscope. This is just a fancy name for a powerful, handheld magnifying device that gives them a super-zoomed-in view of your scalp and individual hair shafts. It's an essential first step.
With a trichoscope, a doctor can quickly spot clues like:
- Miniaturized Hairs: The classic sign of male pattern baldness, where follicles are shrinking over time.
- "Exclamation Point" Hairs: A hallmark indicator of alopecia areata, an autoimmune condition.
- Scalp Inflammation: Redness, flaking, or scaling that could point to a skin condition like seborrheic dermatitis or psoriasis.
Trichoscopy is fantastic for getting a detailed look at what’s happening on the surface. But it’s a bit like looking at the tip of an iceberg; it can’t show you what’s going on down below, where the hair follicle roots live.
Blood Tests: Checking Under The Hood
Another common starting point is a simple blood test. Your hair's health is often a direct reflection of your body's overall wellness, so blood work helps rule out any internal issues that might be causing your hair to thin or fall out.
A doctor will typically check for things like:
- Thyroid problems (both overactive and underactive).
- Nutrient deficiencies, especially low iron, vitamin D, or zinc.
- Hormonal imbalances.
Blood tests are crucial for spotting these systemic problems. But what if your blood work comes back completely normal and your hair is still thinning? That tells you the problem isn't internal—it's located right at the scalp level, which is where a biopsy comes in.
To help you see how these tools fit together, here’s a quick comparison.
Hair Loss Diagnostic Tool Comparison
| Tool | What It Is | What It Reveals | Best For |
|---|---|---|---|
| Trichoscopy | A handheld magnifying scope | Surface-level details of hair shafts and scalp skin, like miniaturization or scaling. | A quick, non-invasive first look for common patterns like male pattern baldness or alopecia areata. |
| Blood Tests | A standard lab analysis of a blood sample | Internal factors like hormone levels, thyroid function, and nutrient deficiencies. | Ruling out systemic health issues that could be contributing to hair loss. |
| Scalp Biopsy | A small skin sample examined under a microscope | The cellular structure of the hair follicle, inflammation, scarring, and follicle density. | Diagnosing complex or scarring alopecias and confirming diagnoses when other tests are inconclusive. |
Ultimately, each tool provides a different piece of the puzzle. The biopsy just happens to be the piece that gives the clearest and most detailed picture.
While other tools provide excellent clues from the surface or from within the body, a scalp biopsy is the only method that provides a direct, cellular-level view of the hair follicle itself. It’s the undisputed gold standard for complex cases.
The Biopsy: The Gold Standard For A Reason
This is where the scalp biopsy truly stands out. While trichoscopy looks at the surface and blood tests check your internal health, a biopsy goes deep into the scalp tissue itself. This allows a pathologist to examine the entire hair follicle structure, the cells around it, and any subtle signs of scarring or inflammation that are completely invisible from the outside.
Here’s a good analogy: trichoscopy is like using satellite imagery to look at a forest, while a biopsy is like taking a soil sample to analyze what’s happening at the roots.
This deep dive is why the biopsy is the ultimate tool for telling the difference between tricky conditions, like various types of scarring alopecia, or for confirming an autoimmune process. It provides the concrete evidence needed for a final, accurate diagnosis. A clear understanding of your follicle health is also critical when considering treatments, and you can learn more about how this is evaluated by looking into a hair density test and what it means for your options.
Common Questions About Scalp Biopsies Answered
Even after you've got the basics down, it’s natural to have a few more practical questions. We get it. Think of this section as your go-to FAQ, where we’ll tackle the most common things men ask us about getting a scalp biopsy for alopecia.
The goal here is simple: to iron out any lingering uncertainties so you can feel completely comfortable and prepared for this crucial step in your hair loss journey.
Does a Scalp Biopsy Hurt and Will It Leave a Scar?
Because the doctor uses a local anesthetic to completely numb the area, the procedure itself shouldn't hurt. You'll likely feel a quick pinch from the numbing injection—much like any other shot—but after that, you won't feel the biopsy at all.
Any soreness afterward is usually mild and easily handled with standard over-the-counter pain relievers. The tiny wound is typically closed with a single stitch. Once it heals, the resulting scar is so small that it’s completely camouflaged by the hair around it, making it virtually undetectable.
Think of it this way: you're making a tiny, hidden trade-off. One small scar in exchange for the definitive diagnosis you need to protect and restore thousands of other hair follicles all over your scalp. It's a smart, strategic play for your long-term hair health.
Will Hair Grow Back Where the Biopsy Was Taken?
The short answer is no. Since the biopsy removes a small, full-thickness piece of skin—including the hair follicles within it—hair won't regrow in that exact spot.
But let’s put this into perspective. The sample is incredibly small, usually around 4 mm in diameter, which is about the size of a pencil eraser. The surrounding hair will easily cover the area. You're essentially sacrificing a handful of follicles to gain the crucial intelligence needed to save the thousands of others.
How Long Does It Take to Get Biopsy Results?
Typically, you can expect to get your results back within one to two weeks. Your sample gets sent off to a specialized lab where a dermatopathologist—a physician who is an expert in diagnosing skin diseases at a microscopic level—will carefully prepare and analyze it.
Once the analysis is done, your dermatologist will get the report and call you to set up a follow-up appointment. That's when you'll go over the findings together and create a treatment plan that's actually based on what's happening on your scalp.
Some patients also ask about other factors that can influence hair health. While the biopsy pinpoints the specific cause of alopecia, supporting your overall well-being is always a good idea. For instance, managing stress with natural supplements for stress and anxiety can be a valuable part of a holistic approach to scalp and hair health.
At PRP For HairLoss, we firmly believe that a clear diagnosis is the most important first step toward stopping hair loss in its tracks. Knowing exactly what you're dealing with is the key to choosing a treatment that will actually work for you. Explore our resources to see how diagnostic clarity can completely change your journey. Find out more at https://prpforhairloss.com.

Leave a comment