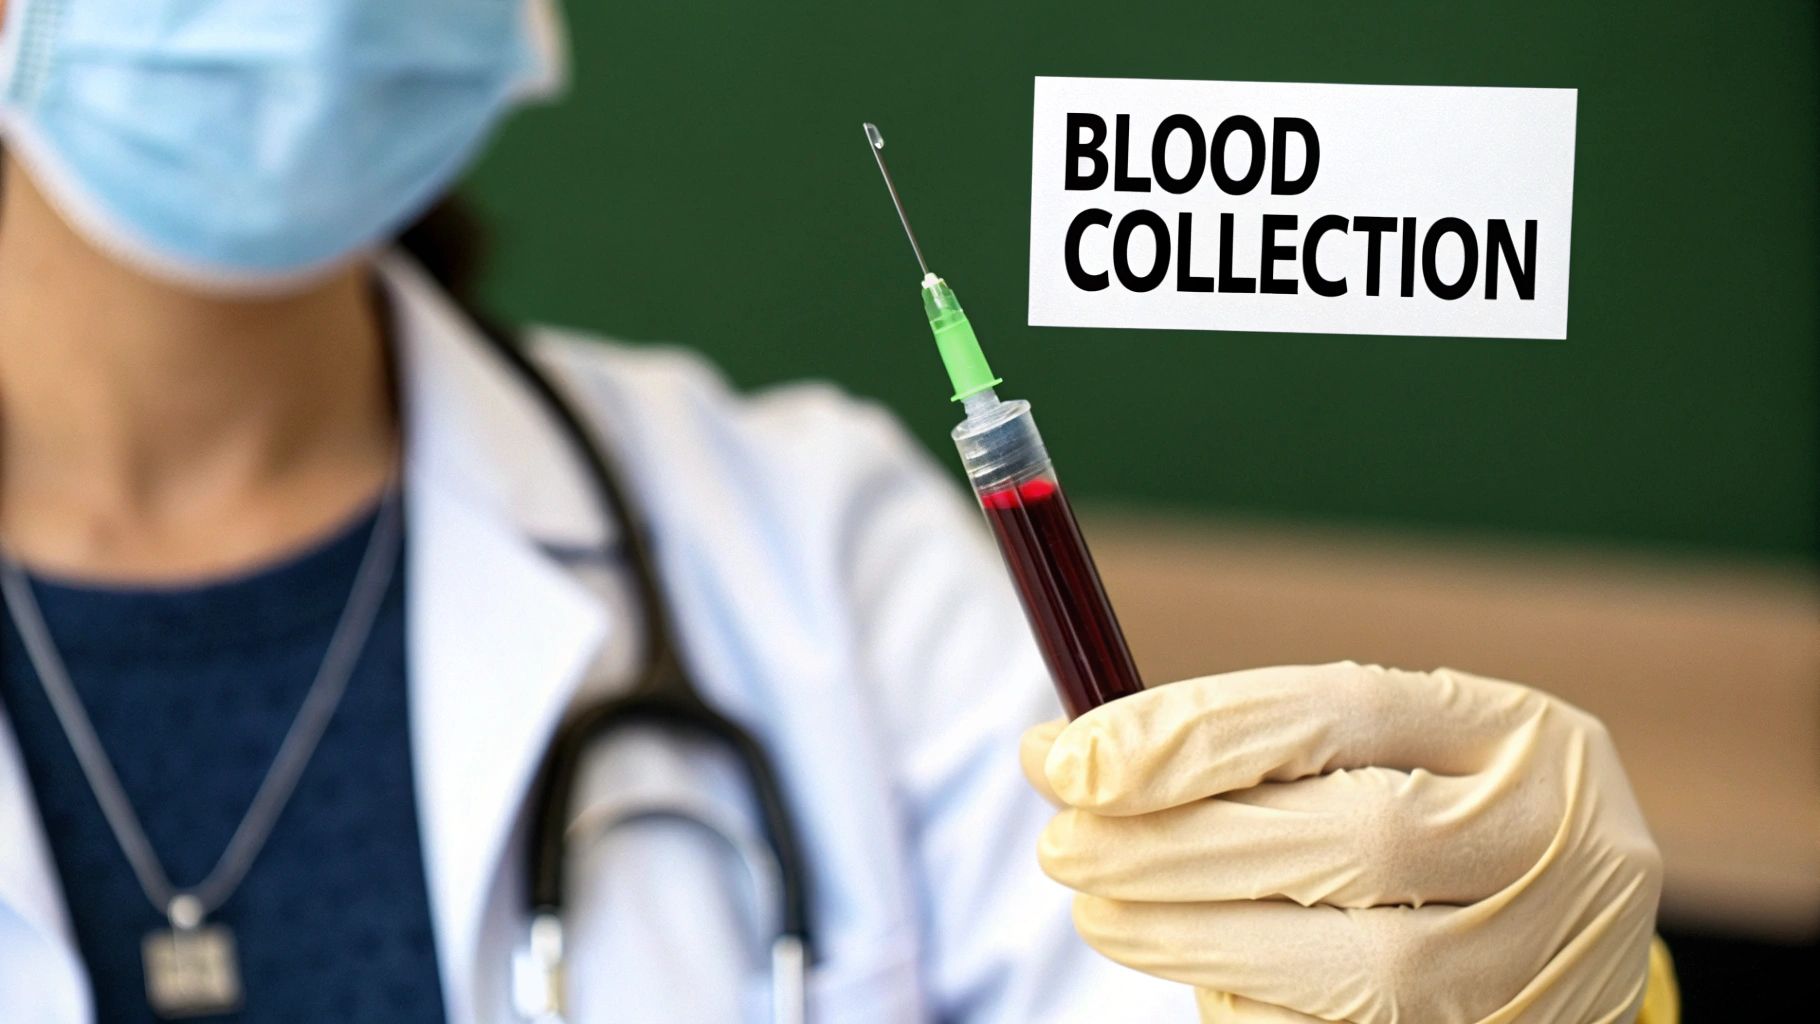
Preparing platelet-rich plasma is so much more than just spinning a tube of blood. It’s a delicate, precise medical technique that isolates and concentrates the natural healing power locked inside your own body. This process is what turns a simple blood sample into a potent regenerative tool, especially for something as specific as stimulating new hair growth.
It’s Not Just About Spinning Blood
To get consistently great results with PRP, you have to appreciate how we got here. The journey from a simple blood bank product to a sophisticated regenerative treatment tells you why every single detail—from the anticoagulant you choose to the G-force in your centrifuge—is critically important.
Every step in the preparation protocol is there for a reason: to pack as many viable growth factors as possible into that final injectable product. When you understand the "why" behind the process, you can go beyond just following the instructions on a kit. You start making smart, informed choices that directly boost the quality and effectiveness of your PRP. This is a game-changer for hair restoration, where precision really does dictate the outcome.
If you're new to this, it's worth taking a moment to understand what platelet-rich plasma is at a fundamental level.
From Blood Banks to Modern Clinics
The idea of concentrating platelets isn't new at all. The origins of what we now call platelet-rich plasma preparation actually go back nearly a century. The real breakthroughs started in the 1920s when citrates were introduced as anticoagulants, which finally made it possible to create stable platelet concentrates from whole blood.
The term "platelet-rich plasma" itself was officially coined back in 1954 to describe these concentrates, which at the time were used almost exclusively for transfusions. By the 1960s, blood banks were preparing PRP routinely, and its use expanded through the 1970s. It’s fascinating to look back at the history and see just how far the science has advanced.
Knowing the history helps you appreciate the precision we have today. Those early preparations were pretty crude by our standards, but they paved the way for the highly controlled protocols we now use for hair loss and skin rejuvenation.
Why Every Little Detail Matters
The evolution from a bulk transfusion product to a targeted regenerative therapy underscores just how much the technique matters. Think about it—every small decision can have a big impact on the final product.
- Which Anticoagulant? The choice between anticoagulants like Acid Citrate Dextrose (ACD-A) or sodium citrate isn't trivial. It affects the platelets' structural integrity and the final pH of your PRP.
- How Hard a Spin? The speed and time of centrifugation are everything. Not enough force, and you won't get clean separation. Too much force, and you risk shredding the very platelets you're trying to harvest, making them completely useless.
- How You Handle It: Even your technique for drawing the blood or extracting the PRP from the tube matters. Clumsy handling can activate the platelets too early, meaning their growth factors get released into the tube instead of into the patient's scalp where they're needed.
At the end of the day, a successful hair restoration treatment hinges on delivering the highest possible number of healthy, unactivated platelets directly to the scalp. That's why a deep, practical understanding of the entire preparation process isn't just helpful—it's essential for getting real, consistent results for your patients.
Setting The Stage For A Successful Procedure
A top-tier PRP yield doesn't just happen; it's the result of meticulous prep work that starts long before the centrifuge spins up. The success of your platelet rich plasma preparation is built on the environment you create, the tools you choose, and the advice you give your patient. Nailing these fundamentals is the only way to get consistent, effective results.
Think of it like a chef prepping a Michelin-star dish—every single ingredient and tool has to be perfectly staged before the cooking even begins. From the specific needle you use for the blood draw to the patient’s hydration level, these small details add up to make or break the quality of your final PRP.
Assembling Your Essential Toolkit
The patient hasn't even walked through the door, and your work has already begun. A flawless setup is paramount. This isn’t just about having supplies on hand; it's about having the right supplies laid out and ready to go, creating a sterile, efficient workflow. A messy station is a recipe for mistakes and contamination.
You need a clean, dedicated space where everything is laid out logically. This simple step minimizes unnecessary movement and keeps the risk of contamination way down.
From my own experience, I've learned that one of the most overlooked steps is simply double-checking your centrifuge calibration. A machine that's even slightly off can completely alter your cell separation, turning a promising sample into a subpar treatment. Make it a routine check, not an afterthought.
Before you start, make sure your station is stocked. Having everything you need within arm's reach is key to a smooth, sterile procedure.
Your Essential PRP Preparation Supply Checklist
This checklist covers the must-haves for a standard PRP preparation. Having these items organized and ready will streamline your process and help you maintain the highest standards of care.
| Item Category | Specific Item | Key Consideration |
|---|---|---|
| Blood Collection | Phlebotomy Supplies (Needle, Hub, Tourniquet) | Use a 21-gauge butterfly needle. Anything smaller can cause shear stress on platelets during the draw, which can activate them too early. |
| Anticoagulation | PRP Collection Tubes | The choice between ACD-A and Sodium Citrate tubes is crucial. I find ACD-A often preserves platelet integrity better over time. |
| Processing | Calibrated Centrifuge | Make sure it’s calibrated for the specific G-force (RCF) your protocol requires, not just RPMs. Accuracy here is everything. |
| Extraction | Sterile Syringes and Needles | Keep multiple sizes handy (e.g., 1ml, 3ml, 5ml) for precisely drawing off the plasma and buffy coat layers. |
| Sterility | Alcohol Swabs, Gauze, Bandages, Gloves | Aseptic technique is non-negotiable. A sterile field isn't an option; it's the absolute standard for any injection-based procedure. |
With your toolkit ready, you can focus entirely on the patient and the procedure without any last-minute scrambling for supplies.
Guiding The Patient For Optimal Platelet Quality
What your patient does in the days leading up to their appointment directly influences the quality of their blood—and their platelets. Providing clear, simple instructions beforehand can make a huge difference in the concentration and viability of the PRP you produce.
One of the most critical instructions is to stop taking non-steroidal anti-inflammatory drugs (NSAIDs), like ibuprofen or naproxen, for at least a week before their appointment. These common medications can interfere with platelet function, undermining the very mechanism you're trying to harness.
Hydration is just as important. When a patient is dehydrated, their blood becomes thicker, making it much harder to get a clean separation of plasma. I always tell my patients to focus on drinking plenty of water for a good 48-72 hours before they come in.
For anyone looking to learn more, this guide on PRP injection for hair is a great resource to share with patients so they understand the process and why their cooperation is so important.
A few other simple lifestyle tweaks can also have a big impact:
- Avoid Alcohol: Tell patients to skip alcoholic drinks for at least three days. Alcohol is dehydrating and can affect platelet function.
- Limit Fatty Foods: A greasy, high-fat meal right before the blood draw can lead to lipemic (cloudy) plasma, which makes it nearly impossible to see the layers you need to separate.
- Eat Well: A balanced diet rich in vitamins and minerals is always a good idea, as it supports overall blood health and contributes to a better-quality sample.
By taking control of these variables, you're setting yourself up for success. This careful prep ensures you're starting with the best possible raw material, which is the first and most important step toward an effective treatment.
The Heart of PRP: Mastering the Centrifuge
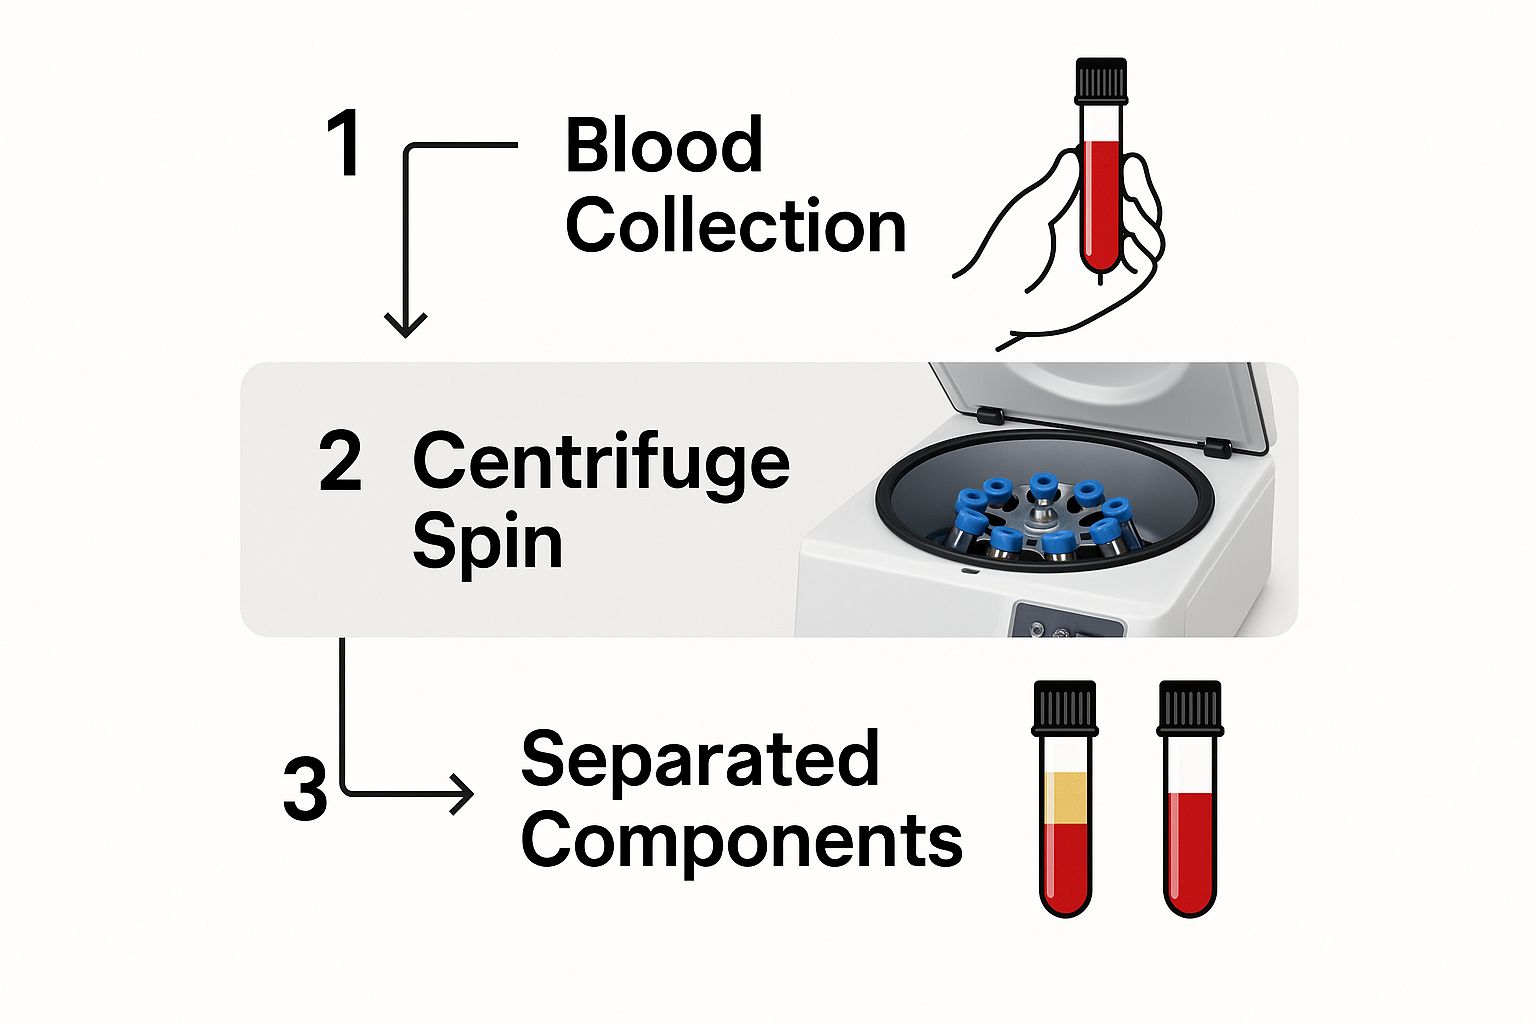
Centrifugation isn't just a step in the process; it is the process. This is where we take a simple blood sample and transform it into a potent concentrate of platelets. But don't be fooled into thinking it's a "set it and forget it" procedure. Getting this right is a mix of hard science and hands-on skill.
The entire point of spinning the blood is to separate it by density. Heavier red blood cells are forced to the bottom, while the lighter plasma floats to the top. The real prize, though, is the buffy coat—that thin, pale layer in between, which is absolutely packed with platelets and white blood cells.
This is what that separation looks like in action. The controlled spin is what allows us to isolate the distinct, usable layers from the whole blood.
Ultimately, the speed and duration of your spin are the two variables that will make or break the quality of your final PRP.
The Great Debate: Single vs. Double Spin
One of the first questions practitioners ask is whether to use a single or double-spin protocol. The truth is, the best method depends entirely on your clinical goal. A single spin is definitely faster and simpler, but you'll almost always end up with a lower platelet concentration.
For serious hair restoration, the double-spin method is widely considered the gold standard. It’s more involved, yes, but it’s how you achieve the high platelet concentrations needed to really make a difference. The first spin gets rid of the red blood cells, and the second spin concentrates the platelets from the remaining plasma. It's that second step that gives you the therapeutic potency we're after.
The whole point of preparing PRP is to get a platelet concentration high enough to be therapeutically effective. Most clinical protocols aim for a concentration that's 3 to 5 times higher than what you'd find in the patient's whole blood. This is the sweet spot for releasing a powerful dose of growth factors right where you need them.
Achieving this requires carefully calibrated centrifugation. The first spin is typically a "soft spin" at a lower force (around 200 to 400 g) for about 10 minutes to separate the red cells. The subsequent "hard spin" uses a much higher speed to turn the platelets into a concentrated pellet that's ready for injection. You can get a deeper dive into the science behind this by checking out the principles of PRP on Wikipedia.
Understanding Your Machine: RCF vs. RPM
It's so easy to get fixated on Rotations Per Minute (RPM), but that number is only half the story. RPM just tells you how fast the rotor is turning. What you really need to focus on is the Relative Centrifugal Force (RCF), which is measured in g-force. RCF is the actual force being applied to the blood sample, and it's what truly drives the separation.
Here’s a common pitfall: two different centrifuges running at the same RPM can produce completely different RCFs if their rotor sizes differ. This is precisely why just copying an RPM from a protocol can lead to inconsistent, disappointing results. You have to know the RCF.
Thankfully, you don't need to be a physicist to figure it out. Most modern centrifuges calculate RCF automatically. If not, plenty of online calculators are available. All you need is your machine's rotor radius in millimeters (measured from the center of the rotor to the bottom of the tube holder).
The formula is straightforward:RCF = 1.118 x 10⁻⁵ x r x (RPM)²
Here, 'r' stands for the rotor radius (mm). Once you know this, you can adapt any protocol to your specific machine, guaranteeing you’re applying the correct force every single time.
Leukocyte-Rich vs. Leukocyte-Poor: What’s Best for Hair?
The force and duration of the spin also dictate the final makeup of your PRP, specifically whether it ends up being leukocyte-rich (LR-PRP) or leukocyte-poor (LP-PRP). Leukocytes, or white blood cells, are found in the buffy coat right alongside the platelets.
- Leukocyte-Rich PRP (LR-PRP): This type contains a significant number of white blood cells. While leukocytes are part of the body's natural healing cascade, they can also promote inflammation, which may lead to more post-injection pain and swelling.
- Leukocyte-Poor PRP (LP-PRP): This version is prepared to specifically remove most of the leukocytes, resulting in a purer concentration of just platelets and their growth factors.
When it comes to hair restoration, the clinical consensus overwhelmingly favors leukocyte-poor PRP. The scalp is a sensitive area, and flooding it with inflammatory cells is often counterproductive. We want to stimulate regeneration, not trigger a strong inflammatory response that could cause discomfort or even hinder follicle activity.
Achieving a clean, LP-PRP comes down to a precise double-spin technique and careful extraction. After the first spin isolates the plasma and buffy coat, the second spin pellets the platelets. The final, critical step involves gently drawing off the top layer of platelet-poor plasma, leaving you with the potent, leukocyte-poor PRP at the bottom of the tube. This meticulous technique is what elevates a treatment from average to truly exceptional.
Isolating and Activating Your Final PRP Product

Once the centrifuge spins down and goes quiet, you’ve reached the most delicate part of the entire process. This is where a steady hand and a good eye make all the difference. Your entire focus is now on carefully extracting that precious plasma and buffy coat without kicking up and aspirating the red blood cells sitting at the bottom.
If you end up with a pink or reddish tint, you’ve pulled in too many red blood cells. It's not just an aesthetic issue; those cells can introduce inflammatory elements that you just worked so hard to separate out. Rushing this step is the single easiest way to ruin a perfectly good sample, so take your time.
Maximizing Your Platelet Yield
The magic of a great PRP treatment is locked away in that platelet-rich layer. Look closely at the tube, and you'll see three distinct layers: the heavy red blood cells at the bottom, a very thin, whitish layer called the "buffy coat," and the golden platelet-poor plasma (PPP) filling the top. The highest concentration of platelets—the good stuff—is right there in the buffy coat and the plasma immediately above it.
Here’s a practical tip from years of experience: use a long spinal needle or a sterile pipette and start by slowly drawing off the top 75% of the plasma. That’s your PPP. While it has some growth factors, it’s not the powerhouse you need for hair restoration. Getting it out of the way first gives you a much better view and more room to maneuver when you go for the prize.
The most common mistake I see is practitioners getting too aggressive when trying to aspirate the buffy coat. A gentle, methodical approach works far better. Think of it like skimming cream—you want to hover just above the red blood cell line, drawing the platelets up without pulling in the unwanted cells.
The Great Activation Debate
With your PRP isolated, you hit a fork in the road. Do you activate the platelets before injecting, or let the body handle it? Activation essentially tricks the platelets into thinking there’s an injury, which makes them dump their entire payload of growth factors. This is a hot topic in the field, with good arguments on both sides.
- Exogenous Activation: This is when you add an activator, like calcium chloride or thrombin, to the PRP right before you inject. This forces a rapid, synchronized release of growth factors from all the platelets at once.
- Endogenous Activation: This approach means you inject the PRP "as is" and rely on the body's natural activators, like the collagen in the tissue, to trigger the growth factor release after injection.
There's no single "right" answer here; your choice really depends on your clinical philosophy. Understanding the pros and cons is key to getting consistent outcomes and setting the right patient expectations. And when you're thinking about results, it's also helpful to understand how long PRP lasts for hair loss, as the activation method can be a factor.
A Practical Comparison of PRP Activation Methods
To make an informed decision, you have to weigh the clinical realities of each approach. This table breaks down the key differences to help you decide which method fits best with your practice.
| Activator | Mechanism | Pros | Cons |
|---|---|---|---|
| Calcium Chloride | Restores the calcium balance that the anticoagulant (citrate) disrupted, kicking off the coagulation cascade and platelet degranulation. | You get a more controlled, predictable release of growth factors. It can also help create a fibrin matrix that holds platelets in the target area. | The immediate growth factor dump might be too rapid for some applications. The resulting gel can also make the injections a bit trickier. |
| Natural (Endogenous) | Platelets are activated upon contact with the body’s own collagen and tissue factors at the injection site. | This method perfectly mimics the body’s natural healing cascade. Growth factors are released more gradually over time, and you avoid adding any external agents. | The release is less controlled and might not be as uniform across the scalp. The initial burst of growth factors won't be as intense. |
In the end, many seasoned practitioners, myself included, lean toward endogenous activation for hair restoration. The thinking is that letting the body do the work provides a more sustained, natural release of growth factors directly into the follicular environment. This slow-and-steady approach over several days seems to be more beneficial for stimulating the long, complex cycle of hair growth than a single, massive burst.
Keeping Your PRP Practice Safe and Effective
Delivering consistently great results with PRP for hair loss boils down to a serious commitment to safety and quality. This is one area where you absolutely cannot cut corners. From the moment you draw blood to the final handling of the PRP concentrate, every step must adhere to strict aseptic techniques. The goal is zero contamination.
It helps to think of it this way: for each patient, you're creating a personalized, high-potency medical treatment. That perspective really underscores the importance of every single action, protecting both the patient's safety and the treatment's integrity. Solid, rigorous protocols are your best defense against complications or lackluster results.
While it feels very modern, PRP has been around for a while. The science really took off with the discovery of epidermal growth factor (EGF) back in 1962 and platelet-derived growth factor (PDGF) in 1974. These discoveries paved the way for its first major clinical use in 1987, when an Italian cardiac surgery team used it to improve healing and cut down on blood loss. You can dive deeper into this journey by exploring the 70-year history of platelet-rich plasma.
Documentation and Handling: Your Procedural Backbone
Meticulous documentation isn't just paperwork; it’s the backbone of any quality medical procedure. For every platelet rich plasma preparation, you have to keep a detailed log. This is completely non-negotiable, both for patient safety and for your own ability to track the consistency of your outcomes.
Your records should always capture these key details:
- Patient Identification: Everything must be clearly labeled with the patient’s name and a unique ID.
- Time Stamps: Note the exact time of the blood draw and the time of the final injection.
- Processing Specs: Record the centrifugation speeds, duration, and the final volume of PRP yielded.
- Kit Information: If you're using a commercial kit, always log the lot number for traceability.
Disposing of waste correctly is just as critical. All your needles, any materials touched by blood, and the collection tubes must go straight into designated biohazard containers, following all medical waste regulations to the letter.
A simple habit that prevents major errors: label the syringe the second you draw up the final PRP. In a busy clinic, it’s a tiny step that completely eliminates the risk of a mix-up, guaranteeing the right patient gets their own personalized treatment.
In-Office Quality Checks
So, how do you really know your process is effective? You can't just wait months for the clinical results to tell the story. You need a way to verify the quality of your PRP right then and there. This is where the top-tier practitioners separate themselves from the rest.
One of the best ways to do this is with a platelet count on your final product. You could send a sample out to a lab, but many clinics are now bringing in-office hematology analyzers. These devices give you a near-instant reading of the platelet concentration. This lets you confirm on the spot that you’ve hit that therapeutic sweet spot—typically 3 to 5 times the patient's baseline platelet count.
Getting that kind of immediate feedback is priceless. It lets you troubleshoot your technique in real-time, validate your centrifuge settings, and prove that your protocol is consistently producing a potent, high-quality PRP. This focus on verifiable quality builds tremendous patient confidence and is essential for getting the best possible hair growth results. Ultimately, following these standards is what minimizes risks, though it's always smart to be fully aware of the common PRP hair treatment side effects to provide truly comprehensive patient care.
Answering Common Questions About PRP Preparation
Even the most seasoned practitioners run into questions when preparing platelet-rich plasma. It's just part of the process. Refining your technique isn't about blindly following steps; it’s about understanding the why behind them.
Think of this as your field guide for the common sticking points. Once you get these down, you'll feel more confident and be ready to handle anything that comes up during a procedure.
What’s the Ideal Platelet Concentration for Hair Loss?
When you’re treating androgenetic alopecia, you're aiming for a final platelet concentration that’s 3 to 5 times what the patient started with. In a typical lab result, this translates to roughly 1 million platelets per microliter. Hitting this therapeutic window is what really kickstarts follicular activity.
Your best bet for achieving this is a double-spin protocol. The first, slower spin gets rid of the red blood cells. It's the second, faster spin that really does the heavy lifting, concentrating the platelets into a potent final product.
The real skill, though, is in the extraction. After that second spin, you have to carefully draw off the platelet-poor plasma (PPP) to get to that small, super-concentrated layer of PRP at the bottom. It's a delicate process, and mastering it is what separates good results from great ones.
Why Are My PRP Yields Inconsistent?
Inconsistent yields are a huge source of frustration, but the culprit is almost always one of a few usual suspects. First, look at your blood draw. If you're using a needle smaller than a 21-gauge or pulling back too hard on the syringe, you can damage the red blood cells (hemolysis) and trigger the platelets prematurely. Your sample is compromised before it even hits the centrifuge.
Next, check your centrifuge every single time. Is it perfectly balanced? A tiny bit of wobble is all it takes to mess up the separation and ruin your sample. This is a simple step, but it's amazing how often it gets overlooked.
Rushing the extraction is another common mistake. When you’re trying to aspirate that buffy coat, patience is everything. If you're clumsy and quick, you're almost guaranteed to pull up red blood cells, which contaminates the sample and tanks the quality of your PRP.
Don't forget to consider the patient, too. Someone who is dehydrated or recently took an NSAID can have less-than-optimal platelet quality. This is why a thorough pre-procedure talk and clear instructions for the patient are so important—they set the stage for a good outcome.
Should I Use PRP With or Without Leukocytes for Hair?
This is a hot topic, but for hair restoration, the evidence is pretty clear: leukocyte-poor PRP (LP-PRP) is the way to go. Leukocytes (white blood cells) are great for healing in general, but they also release pro-inflammatory molecules called cytokines.
On the scalp, too much inflammation is the last thing you want. It can actually be counterproductive, potentially harming the very follicles you’re trying to help. It also tends to cause more pain and swelling for the patient after the injection. Many patients want to know if PRP is effective, and minimizing these side effects is part of a successful treatment. You can find more details by reading about whether PRP works for hair loss.
LP-PRP gives you all the powerful growth factors from the platelets without the inflammatory baggage. It creates a much better environment for hair regeneration. It’s also interesting to note that PRP is frequently discussed among various eyebrow growth treatment options for similar regenerative purposes. The best double-spin systems are designed specifically to separate and remove most of these leukocytes, leaving you with a purer product that's perfect for hair restoration.
At PRP For HairLoss, we're committed to providing clear, factual information to help you understand your options for tackling hair loss. Explore our resources to learn more about the treatments that could work for you.


Leave a comment