A scalp biopsy is a minor in-office procedure where a dermatologist takes a tiny sample of your scalp tissue—about the size of a pencil eraser—to examine under a microscope.
Think of it this way: when you're dealing with hair loss, the initial consultation is like a detective's first look at a crime scene. Sometimes, the clues are obvious. But when they're not, a biopsy is like sending evidence to the forensics lab. It’s not the first step in an investigation, but it's often the final, decisive one needed to pinpoint the exact cause before you start treatment.
When a Scalp Biopsy Becomes Necessary for Hair Loss
Most of the time, common types of hair loss, like male or female pattern baldness, can be diagnosed with a good look at your scalp and a chat about your health history. An experienced dermatologist can often spot the classic signs of androgenetic alopecia without needing to go any further.
But what happens when the picture is murky?
A scalp biopsy for hair loss becomes the go-to tool when the reason for your thinning is unclear, or when it looks like multiple issues could be happening at once. It's the gold standard for getting to the bottom of things when symptoms overlap or show up in an unusual way.
Distinguishing Between Similar Conditions
Imagine trying to tell two very similar-looking cars apart from a distance. You can guess, but you won't know for sure until you pop the hood and look at the engine. A scalp biopsy is like popping the hood on your hair loss.
Many types of alopecia can fool the naked eye. They can look almost identical on the surface. Here are the key situations where a dermatologist will likely recommend a biopsy:
- Unclear Diagnosis: Your hair loss doesn't fit the textbook pattern of a common condition. Maybe it's diffuse, patchy, or just… odd.
- Suspected Scarring Alopecia: This is a big one. Conditions like lichen planopilaris or central centrifugal cicatricial alopecia (CCCA) cause inflammation that permanently destroys hair follicles. Getting an early, accurate diagnosis with a biopsy is absolutely critical to stopping the damage before it's too late.
- Treatment Isn't Working: You've been following a treatment plan for a while but aren't getting the results you should be. A biopsy can either confirm the diagnosis is correct (and maybe a different treatment is needed) or reveal that you've been treating the wrong problem all along.
To make it clearer, here's a quick breakdown of when a doctor might reach for this tool.
When a Scalp Biopsy Is Typically Recommended
| Scenario | Biopsy Recommended (Yes/No) | Reason |
|---|---|---|
| Classic male/female pattern baldness with a clear history. | No | The visual signs are usually enough for a confident diagnosis. |
| Suspected scarring alopecia with inflammation and scaling. | Yes | It's crucial to confirm and start aggressive treatment to prevent permanent follicle destruction. |
| Hair loss that doesn't respond to standard treatments. | Yes | Helps to confirm or correct the initial diagnosis and guide a new treatment strategy. |
| Sudden, widespread shedding after a stressful event. | No | This is a classic sign of telogen effluvium, which is usually diagnosed based on medical history. |
| Atypical pattern of thinning or unusual scalp symptoms. | Yes | When the signs don't fit a common diagnosis, a biopsy provides a definitive look at the cellular level. |
Essentially, the biopsy provides certainty when it's needed most, ensuring you don't waste time and money treating the wrong condition.
Key Insight: A scalp biopsy isn't just about figuring out what you have; it's also about definitively ruling out what you don't. This precision is what allows for a truly effective treatment plan.
The Power of Microscopic Evidence
The real value of a scalp biopsy is the wealth of information it gives a dermatopathologist—a doctor who specializes in diagnosing diseases by looking at skin tissue. They examine the sample for very specific clues.
They’re looking at the size and shape of your hair follicles, checking for the presence and type of inflammatory cells, and searching for any signs of scar tissue. This detailed analysis is incredibly powerful.
For example, its importance is well-documented even in common conditions. One study found a scalp biopsy was essential for diagnosing female pattern hair loss in more than half (56%) of cases where women had no obvious signs of scalp disease. You can learn more about its diagnostic value by reading the full research.
This level of precision ensures your treatment plan is built on a solid foundation of evidence, targeting the exact cause of your hair loss from day one.
Your Step-by-Step Guide to the Biopsy Procedure
Let's be honest, the words "scalp biopsy" can sound a little nerve-wracking. But in reality, a scalp biopsy for hair loss is a remarkably quick and minor procedure that delivers major answers. Knowing exactly what happens from start to finish can make all the difference, taking the mystery out of the process and putting you at ease.
Think of it this way: a biopsy isn't the first step. It's a precise diagnostic tool used when a dermatologist needs to look deeper, as the following chart shows.
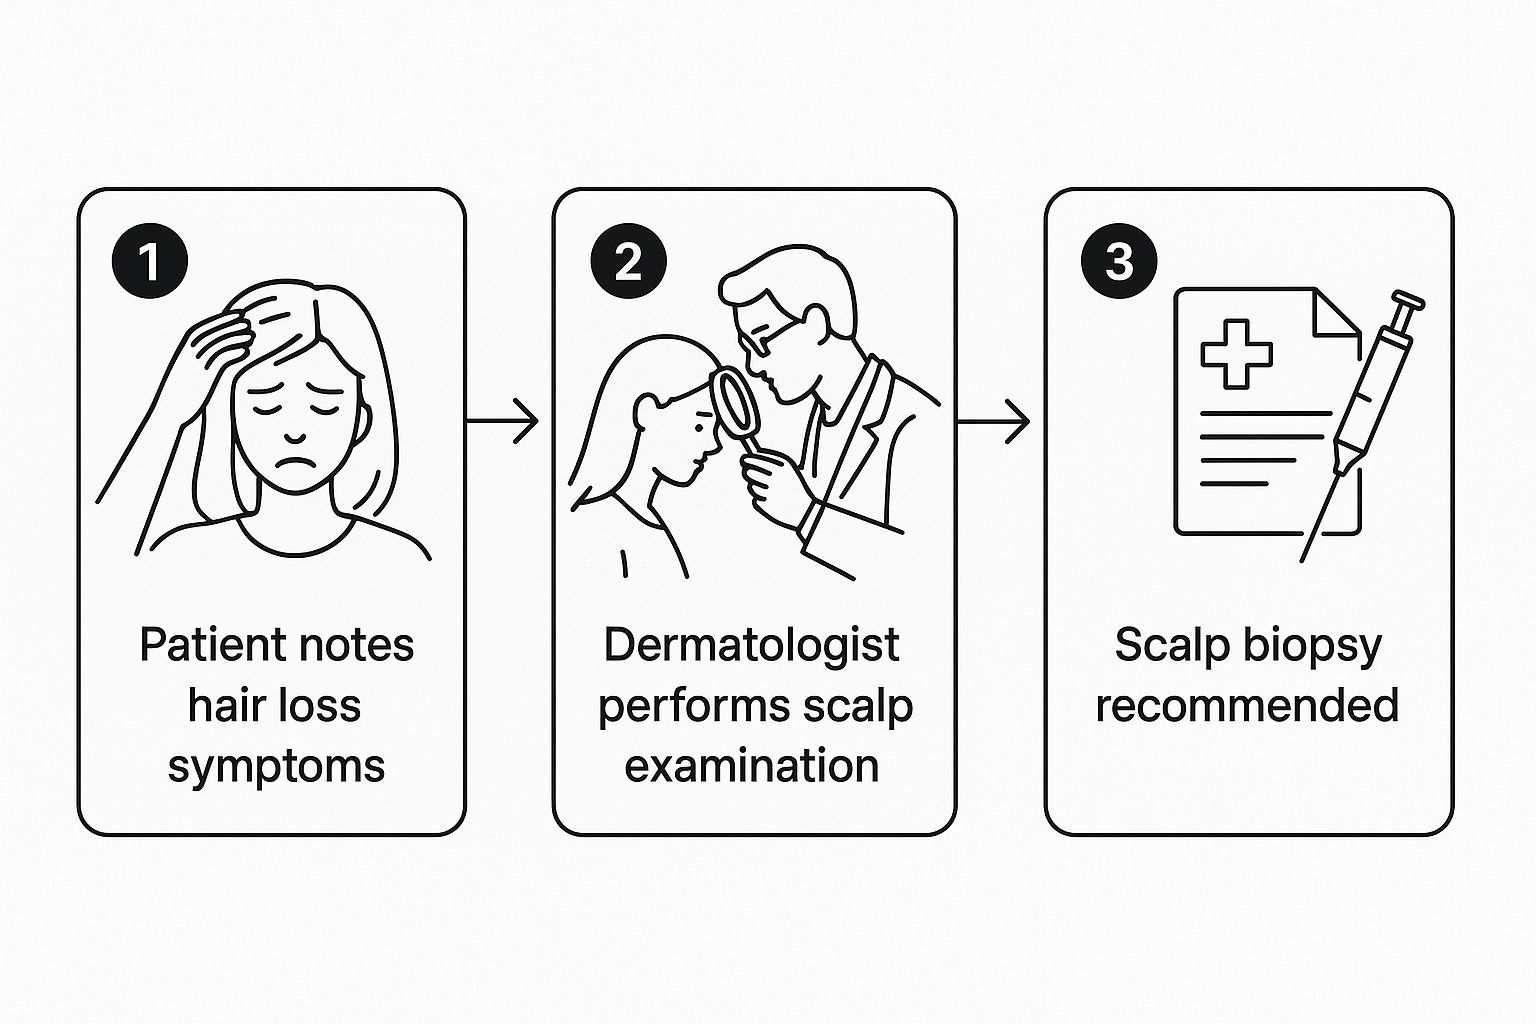
As you can see, it comes into play after an initial exam raises questions that only a microscopic view can answer.
Before You Arrive: Identifying the Right Spot
Your dermatologist's expertise shines before the procedure even begins. They'll carefully examine your scalp to pinpoint the perfect spot for the sample—one that tells the story of your hair loss while remaining easily concealed.
The goal is to find an area with active thinning that can be discreetly covered by surrounding hair. This is usually on the top or back of the head, not right at your front hairline. Once they’ve picked the spot, they'll trim a tiny patch of hair, about the size of a dime, to get a clear workspace. That's it. No, you absolutely do not need to shave your head.
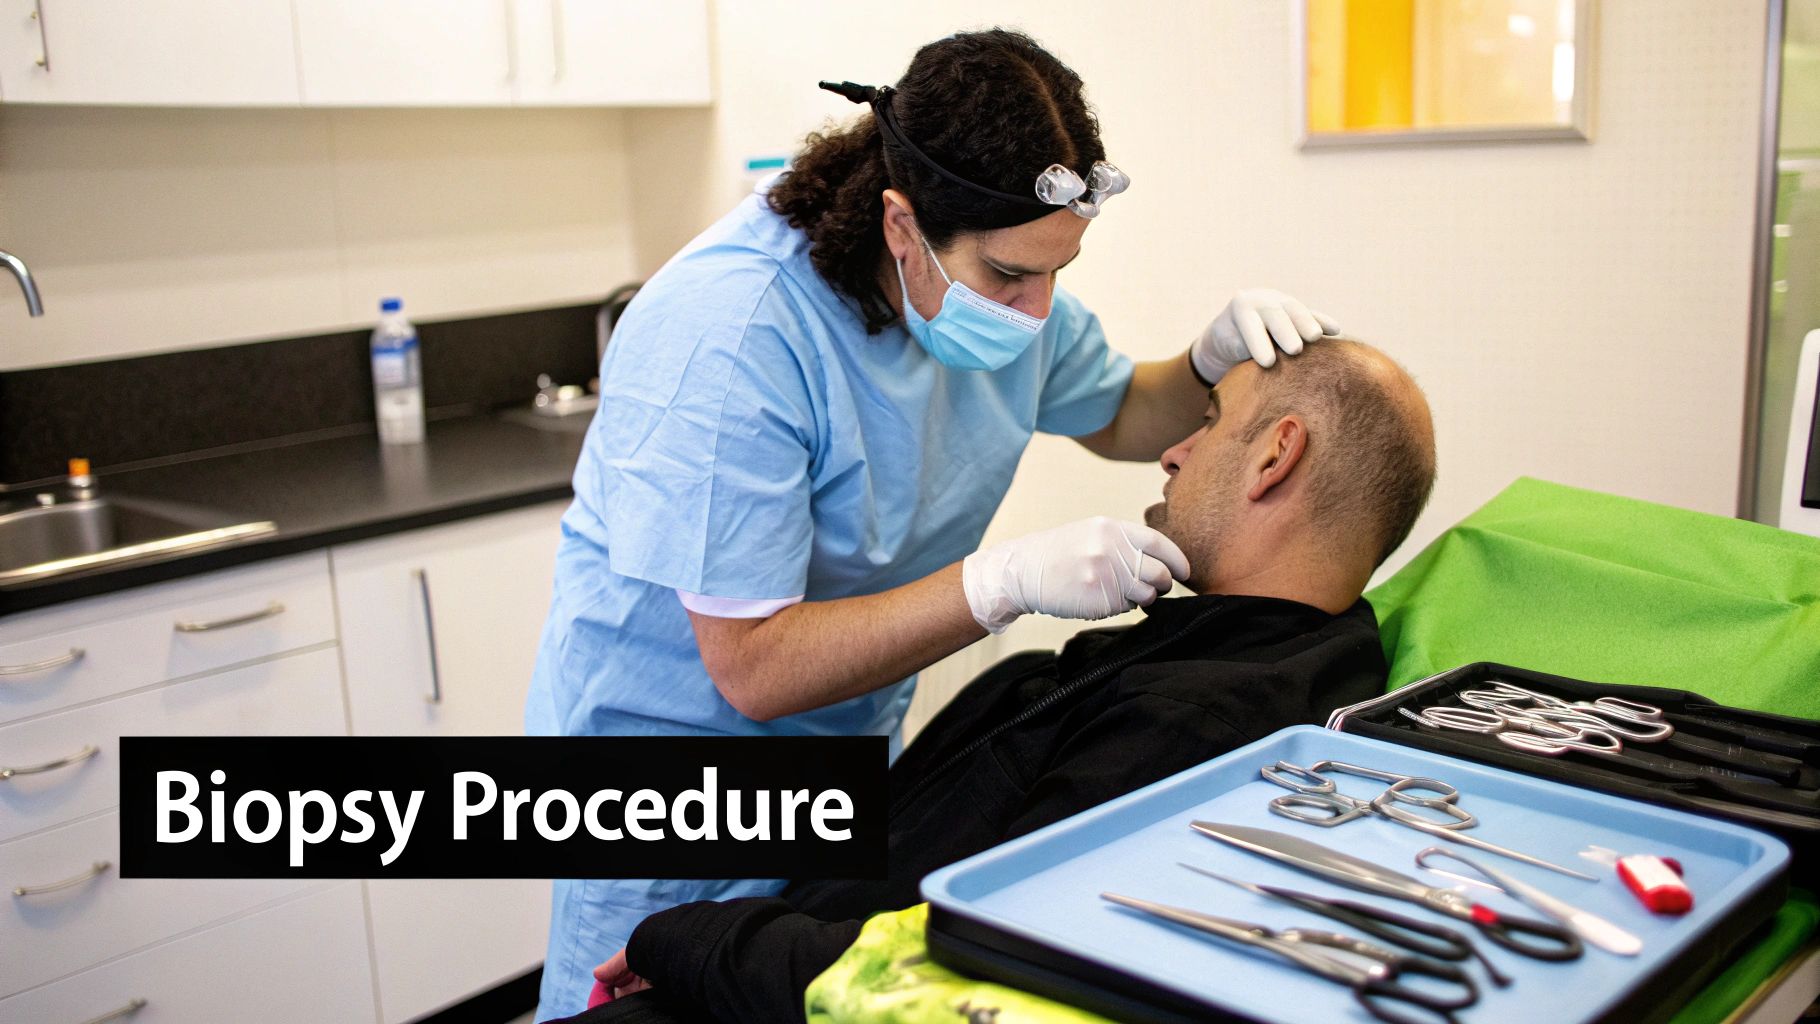
The Biopsy Procedure Itself
The whole thing is over in a flash, typically lasting just a few minutes. It's a routine and highly practiced process designed for minimal discomfort. Here’s a play-by-play of what to expect:
-
Numbing the Area: First things first, your doctor will numb the spot with a local anesthetic. They'll use a very small needle to inject something like lidocaine. You’ll feel a quick pinch—some say it's like a brief bee sting—that lasts only seconds. After that, the area will be completely numb.
-
Taking the Sample: Once you're numb, you won't feel any pain. The most common technique is a punch biopsy. Your dermatologist uses a sterile tool that looks like a miniature cookie cutter, usually just 4mm in diameter. They press it gently against your scalp and rotate it to collect a tiny, cylinder-shaped piece of tissue. You might feel some pressure, but that’s it.
-
Closing the Site: With the sample collected, the small opening needs to be closed. In most cases, this takes just a single stitch (suture) to help the skin heal cleanly. The doctor places the stitch, ties it off, and just like that, the procedure is done.
The entire hands-on part of the biopsy, from the numbing shot to the final stitch, often takes less than five minutes. It’s a very safe and standard in-office procedure.
Immediately After the Biopsy
With the stitch in place, your doctor will apply a dab of antibiotic ointment and cover the spot with a small bandage. They'll also give you clear instructions on how to care for the wound over the next week or so.
You can drive yourself home and get back to your day with almost no restrictions. When the anesthetic wears off in a few hours, you might feel some mild soreness, but it's usually nothing that an over-the-counter pain reliever like Tylenol can't handle.
That tiny tissue sample is then placed in a preservative solution and sent to a specialized lab. There, a dermatopathologist—a pathologist who specializes in skin—will analyze it under a microscope. This is where the real detective work begins. You can typically expect to get your results and review them with your dermatologist within one to two weeks.
Getting Ready for Your Biopsy and Nailing the Recovery
A successful scalp biopsy for hair loss isn't just about what happens in the clinic—it's equally about how you prepare beforehand and what you do afterward. A little prep work and careful aftercare are your secret weapons for a smooth, easy experience. By taking a few simple steps, you can help the site heal quickly and make sure the whole process goes off without a hitch.
Think of it as setting the stage for success. Your proactive approach puts you in the driver's seat, making the biopsy less stressful and much more predictable.
Your Pre-Biopsy Checklist
Your dermatologist will give you a list of specific instructions before your appointment. For the most part, these will be focused on making sure your scalp is clean and that you haven't taken any medications that could complicate the procedure.
Here’s what you can generally expect to do:
- Wash Your Hair: It's a great idea to wash your hair on the morning of your biopsy. A clean scalp is the first line of defense against infection.
- Skip the Products: On the day of your procedure, go natural. Avoid hairspray, gels, dry shampoo, or any topical hair loss treatments like minoxidil. You want the biopsy site to be totally clear.
- Talk About Your Meds: This is a big one. You need to tell your doctor about everything you take—medications and supplements included. Pay special attention to blood thinners like aspirin or warfarin, and even supplements like high-dose fish oil or vitamin E, as these can increase bleeding. Your doctor will tell you if you need to pause them for a few days.
To keep your scalp in top condition and encourage smooth healing, using gentle products is key. For instance, a quality sensitive scalp shampoo can help maintain a healthy scalp without causing any irritation around the biopsy area.
Post-Biopsy Wound Care: The First 48 Hours
The first two days after your biopsy are the most critical for healing. Your main job is simple: keep the area clean, dry, and protected.
Important Takeaway: Those initial 48 hours really set the tone for your entire recovery. Follow your doctor's instructions to the letter during this time to sidestep any complications and give your body the best chance to heal perfectly.
You'll head home with a small bandage covering the spot. Here’s your game plan:
- Leave the Bandage Alone: Keep that first dressing on for at least 24 hours, or for as long as your doctor tells you to.
- Keep It Dry: Don't wash your hair for the first 24-48 hours. This gives the tiny wound a chance to seal up and keeps you from accidentally messing with the stitch.
- Use Your Ointment: After the first day, you'll likely be told to gently clean the area and apply a dab of antibiotic ointment (like Polysporin) once or twice daily. This keeps the wound moist and helps prevent infection.
- Handle Any Soreness: Most people feel only minor discomfort, which is easily handled with over-the-counter acetaminophen (Tylenol). It's best to avoid ibuprofen or aspirin unless your doctor gives you the green light, as they can sometimes increase bleeding.
Healing and Recovery in the Week That Follows
Once you're past the first couple of days, your focus will shift to just letting the stitch do its work while you ease back into your normal life—with a few small tweaks.
Activity and Hair Care
- Washing Your Hair: After about 48 hours, you can usually start washing your hair gently. Just let the water run over the area; don't scrub right on the stitch. When you're done, pat the spot dry carefully with a clean towel.
- Avoid Strenuous Activity: For about a week, take a break from intense workouts, swimming, or any heavy lifting. Anything that spikes your blood pressure or makes you sweat a lot can interfere with healing.
- Style with Care: Be mindful of how you handle your hair. Avoid any pulling or tugging near the biopsy site, and be extra gentle when brushing or combing.
The stitch will typically be ready to come out in 7 to 14 days. Your dermatologist's office will set up a follow-up appointment for this. After the stitch is removed, you're pretty much in the clear, though it may take a few more weeks for the tiny mark to fully fade.
Decoding Your Biopsy Results and What They Mean for You
https://www.youtube.com/embed/vDW6GsCZ43k
Once your scalp sample is collected, it’s sent off to a specialized lab. This is where the real detective work begins. Your small tissue sample goes to a dermatopathologist—a doctor who specializes in diagnosing skin and hair conditions at a microscopic level. They don't just give it a quick look; they carefully prepare, stain, and analyze it to pinpoint the exact cause of your hair loss.
The pathologist's report can look intimidating, full of medical jargon. But every term is a clue. They’re hunting for specific signs that point to a diagnosis, turning that tiny piece of tissue into a clear roadmap for your treatment. Getting a handle on what they’re looking for helps you understand why your doctor is recommending a certain treatment, so you can feel confident about the path forward.
What the Pathologist Is Looking For
The dermatopathologist essentially acts as an inspector for your scalp's ecosystem. They examine the tissue from two different angles—horizontally and vertically—to build a complete, 3D picture of what’s happening below the surface. It’s a deep dive into the very structures responsible for hair growth.
Their investigation focuses on a few key areas:
- Hair Follicle Health: Are the follicles a normal size and shape, or are they shrinking (a process called miniaturization)?
- Inflammation: Are there inflammatory cells hanging around? Where they are and what kind they are can be a dead giveaway for certain types of alopecia.
- Scar Tissue: Is there fibrosis or scarring? This is a critical finding, as it suggests healthy follicles are being replaced.
- Hair Cycle Phases: They check the ratio of growing hairs (anagen) to resting hairs (telogen). If this balance is off, it can signal specific conditions.
Translating Key Terms From Your Report
Your biopsy report will list specific observations. Your dermatologist will, of course, explain everything, but knowing some of the key terms yourself can make that conversation much more productive.
Follicular Miniaturization
This is the classic sign of androgenetic alopecia, also known as male or female pattern baldness. It means your hair follicles are getting progressively smaller, producing thinner and weaker hairs with each cycle. Seeing this on a report confirms that genetics and hormones are the main culprits.
Perifollicular Inflammation
This term just means there's inflammation around the hair follicles. The specifics matter a lot. For instance, an infiltration of lymphocytes (a type of white blood cell) is often linked to conditions like alopecia areata or lichen planopilaris.
Fibrosis or Scarring
Finding scar tissue points toward a diagnosis of cicatricial alopecia, or scarring alopecia. In these conditions, inflammation is permanently destroying the follicles and replacing them with scar tissue. This is why catching it early is so important.
The goal of a scalp biopsy is to turn uncertainty into clarity. The report provides objective, microscopic evidence that either confirms a suspected diagnosis or reveals an unexpected one, ensuring your treatment plan is perfectly aimed at the true cause.
Ultimately, the findings on your report connect directly to a diagnosis. For example, a high number of telogen (resting) hairs without much inflammation often points to telogen effluvium, which can be triggered by stress or illness. In contrast, seeing miniaturized follicles without significant inflammation is a strong indicator of pattern baldness.
As technology improves, new tools are helping pathologists interpret this complex data. It's interesting to see how AI for medical diagnosis is starting to play a bigger role in this field, helping to analyze tissue with even greater accuracy. This detailed analysis is what gives your doctor the definitive answer they need to build a truly effective treatment strategy for you.
Weighing the Risks, Costs, and Alternatives
Anytime you're considering a medical procedure, even a minor one, it's natural to want the full story. A scalp biopsy for hair loss is an incredibly useful diagnostic tool, but a smart decision means weighing everything—the potential risks, the cost, and what other options are on the table. Let's walk through it so you know exactly what to expect.
The great news is that scalp biopsies are very safe. When a skilled dermatologist is at the helm, complications are few and far between. It’s a minimally invasive procedure, but since it does involve breaking the skin, there are a handful of minor possibilities to keep in mind.
What Are the Potential Risks?
Honestly, most people sail through a scalp biopsy with no trouble at all. The risks are typically small and easy to handle.
- A Tiny Scar: The most common thing to expect is a small, permanent mark where the tissue was removed. We're talking about a punch tool that's only about 4mm wide—roughly the size of a pencil eraser. The scar it leaves is usually a little flat dot that gets completely lost once your hair grows around it.
- Minor Bleeding: A little bleeding during the procedure is perfectly normal. It’s quickly controlled with a bit of pressure or a single stitch. You might see a tiny bit of oozing afterward, which is exactly why following your doctor's aftercare instructions is so important.
- Infection: Just like any cut or scrape, there's a slight chance of infection. Your dermatologist minimizes this by thoroughly cleaning the area beforehand and will likely have you apply an antibiotic ointment for a few days as it heals.
- Soreness: Once the local anesthetic wears off, it's common to feel a bit of tenderness at the biopsy site for a day or two. This is usually nothing that an over-the-counter pain reliever like acetaminophen can't handle.
Breaking Down the Cost of a Scalp Biopsy
The price tag for a scalp biopsy can vary, but it's generally an affordable diagnostic step. What you'll actually pay boils down to a few key factors:
- Your Insurance Plan: The good news is most insurance providers cover a scalp biopsy when it's medically necessary to get a diagnosis. Your out-of-pocket cost will depend on your specific plan's deductible, co-pay, and overall coverage.
- Clinic and Lab Fees: The final bill is typically split into two parts. You'll have a fee from the dermatologist for performing the procedure itself, and a separate fee from the pathology lab that does the heavy lifting of analyzing the tissue.
- Where You Live: It's a simple fact of life that medical costs can be quite different from one city or state to the next.
Before you book the appointment, it's always smart to have a quick chat with both your insurance company and the dermatologist's office to get a clear picture of the estimated cost.
Are There Alternatives to a Biopsy?
While a scalp biopsy is a powerful tool, it isn't always the first or only stop on the diagnostic journey. Your dermatologist has a few other tricks up their sleeve to figure out what's causing your hair loss.
Key Insight: A biopsy is really reserved for those tricky situations where other methods can't give a clear "yes" or "no." It’s a tool for precision, not a routine first step for every person who walks in with thinning hair.
Take pattern hair loss (androgenetic alopecia), for instance. It's the most common reason for hair loss in the world, and it has such a classic appearance that a scalp biopsy for hair loss is rarely needed to diagnose it. A simple clinical exam is usually enough. The biopsy is saved for cases that are more complex or don't fit the typical mold. You can learn more about how pattern hair loss is diagnosed on Wikipedia.
Other diagnostic tools your doctor might use first include:
- Trichoscopy: This is a completely non-invasive method where your doctor uses a special handheld dermatoscope—think of it as a high-powered magnifying glass for the skin—to get an up-close look at your scalp and hair shafts.
- Hair Pull Test: It sounds simple because it is. Your dermatologist gently tugs on a small group of about 50 hairs to see how many come out. This can be a great indicator for conditions like telogen effluvium, where an unusual number of hairs are shedding at once.
Think of these alternatives as the first line of investigation. The biopsy is the specialist you call in when the initial clues just aren't adding up.
Common Questions About Scalp Biopsies

Even after learning what a scalp biopsy for hair loss involves, it’s completely normal to have some questions rattling around in your head. This is a significant step in getting answers, so feeling totally informed is the best way to feel comfortable moving forward.
To help put your mind at ease, I've put together answers to the most common questions I hear from patients. Think of this as your go-to guide for the practical, real-world concerns that come up before and after the procedure.
Will the Scalp Biopsy Leave a Noticeable Scar?
This is usually the very first thing people ask, and the answer is almost always reassuring. The entire procedure is designed from the ground up to be minimally invasive and cosmetically sensitive. Your dermatologist will likely use a 4mm punch tool, which is roughly the size of a standard pencil eraser.
While any time the skin is broken there will technically be a mark, dermatologists are masters at hiding it. They’ll strategically pick a spot where your existing hair can easily conceal the tiny scar. Once everything is healed up, it typically just looks like a small, flat dot that becomes virtually invisible to everyone—including you.
Is the Procedure Actually Painful?
The idea of any procedure on your head can be a little intimidating, but pain is one thing you really don't need to worry about. Before anything begins, your dermatologist will numb the area completely using a local anesthetic delivered with a very fine needle.
You’ll feel a brief sting from the injection—most people say it feels like a quick pinch—that only lasts for a few seconds. After that, the entire area goes numb. You won't feel any pain during the actual biopsy, though you might be aware of a bit of pressure or tugging. It’s more of an odd sensation than a painful one.
Later, as the anesthetic wears off, the spot might feel a little sore for a day or two. This is usually very mild and easily managed with over-the-counter pain relievers like Tylenol.
How Long Until I Get My Results?
I know the waiting part is tough, but you won't be left in suspense for too long. In most cases, it takes about one to two weeks to get the final results back from your scalp biopsy.
This timeframe gives the lab the time it needs to do a thorough job. The tissue sample has to be processed, sliced into incredibly thin sections, stained with special dyes to highlight different cellular structures, and then carefully examined under a microscope by a dermatopathologist—a doctor who specializes in skin pathology.
Once the report is ready, your dermatologist's office will call you to schedule a follow-up or discuss the findings over the phone.
Do I Need to Shave My Head for a Biopsy?
Absolutely not. This is a common myth that causes a lot of unnecessary stress. You do not need to shave your head or even a large patch of hair for a scalp biopsy.
Your dermatologist will only trim a very small circle of hair, usually no bigger than a dime, right where the sample will be taken. This is simply to give them a clear, clean view of the skin. This tiny trimmed area is easily covered by your surrounding hair, making it completely invisible to others. You can walk out of the clinic and go about your day without anyone knowing you had anything done.
In clinical practice, a scalp biopsy is regarded as the gold standard for diagnosing certain types of alopecia, especially cicatricial (scarring) alopecia. While it can also help with diffuse hair loss, the procedure's invasive nature means it's typically reserved for cases where a definitive answer is crucial. You can discover more insights about its diagnostic evaluation on emjreviews.com.
Can I Dye My Hair Before the Biopsy?
It's really best to hold off on any chemical treatments right before your procedure. To get the most accurate results, the pathologist needs to see your scalp and hair follicles in their natural state.
Here’s a good rule of thumb:
- Avoid Hair Dye: Don't color your hair for at least one to two weeks before your scheduled biopsy. The chemicals in hair dye can sometimes irritate the scalp and potentially interfere with how the pathologist interprets the sample.
- Post-Biopsy Coloring: You’ll want to wait until your stitch is out and the site is fully healed before you color your hair again. This usually means waiting about two to three weeks after the procedure.
When Can I Wash My Hair and Resume Normal Activities?
You'll be able to get back to your routine very quickly, with just a few small adjustments to protect the healing site.
- Washing Your Hair: You'll need to keep the area dry for the first 24 to 48 hours. After that, you can gently wash your hair. Just let the soapy water run over the area; don't scrub the stitch directly. Pat it dry carefully afterward.
- Exercise: It's a good idea to skip strenuous exercise, swimming, or heavy lifting for about a week. Anything that causes a lot of sweating or raises your blood pressure can slow down the healing process.
- Styling: Be gentle! Avoid putting hair products directly on the wound, and be mindful not to pull or snag the stitch when you're brushing or combing your hair.
Your stitch will typically be removed 7 to 14 days after the procedure. Once it's out, you can get back to all your normal activities without worry.
At PRP For Hairloss, we believe that understanding every aspect of hair loss diagnosis and treatment is the first step toward reclaiming your confidence. While a scalp biopsy provides critical answers, exploring all your options is just as important for your journey.


Leave a comment